Metal detecting needn't require spending a lot of money. Bargains and good values are out there. I don't have a lot of spare money to spend on a hobby, but that doesn't stop me from enjoying myself. Here's what goes with me into the field (or park or yard). Click on any photo to see it full-size. Click here to see my ongoing journal showing what I've found. All photos copyrighted.
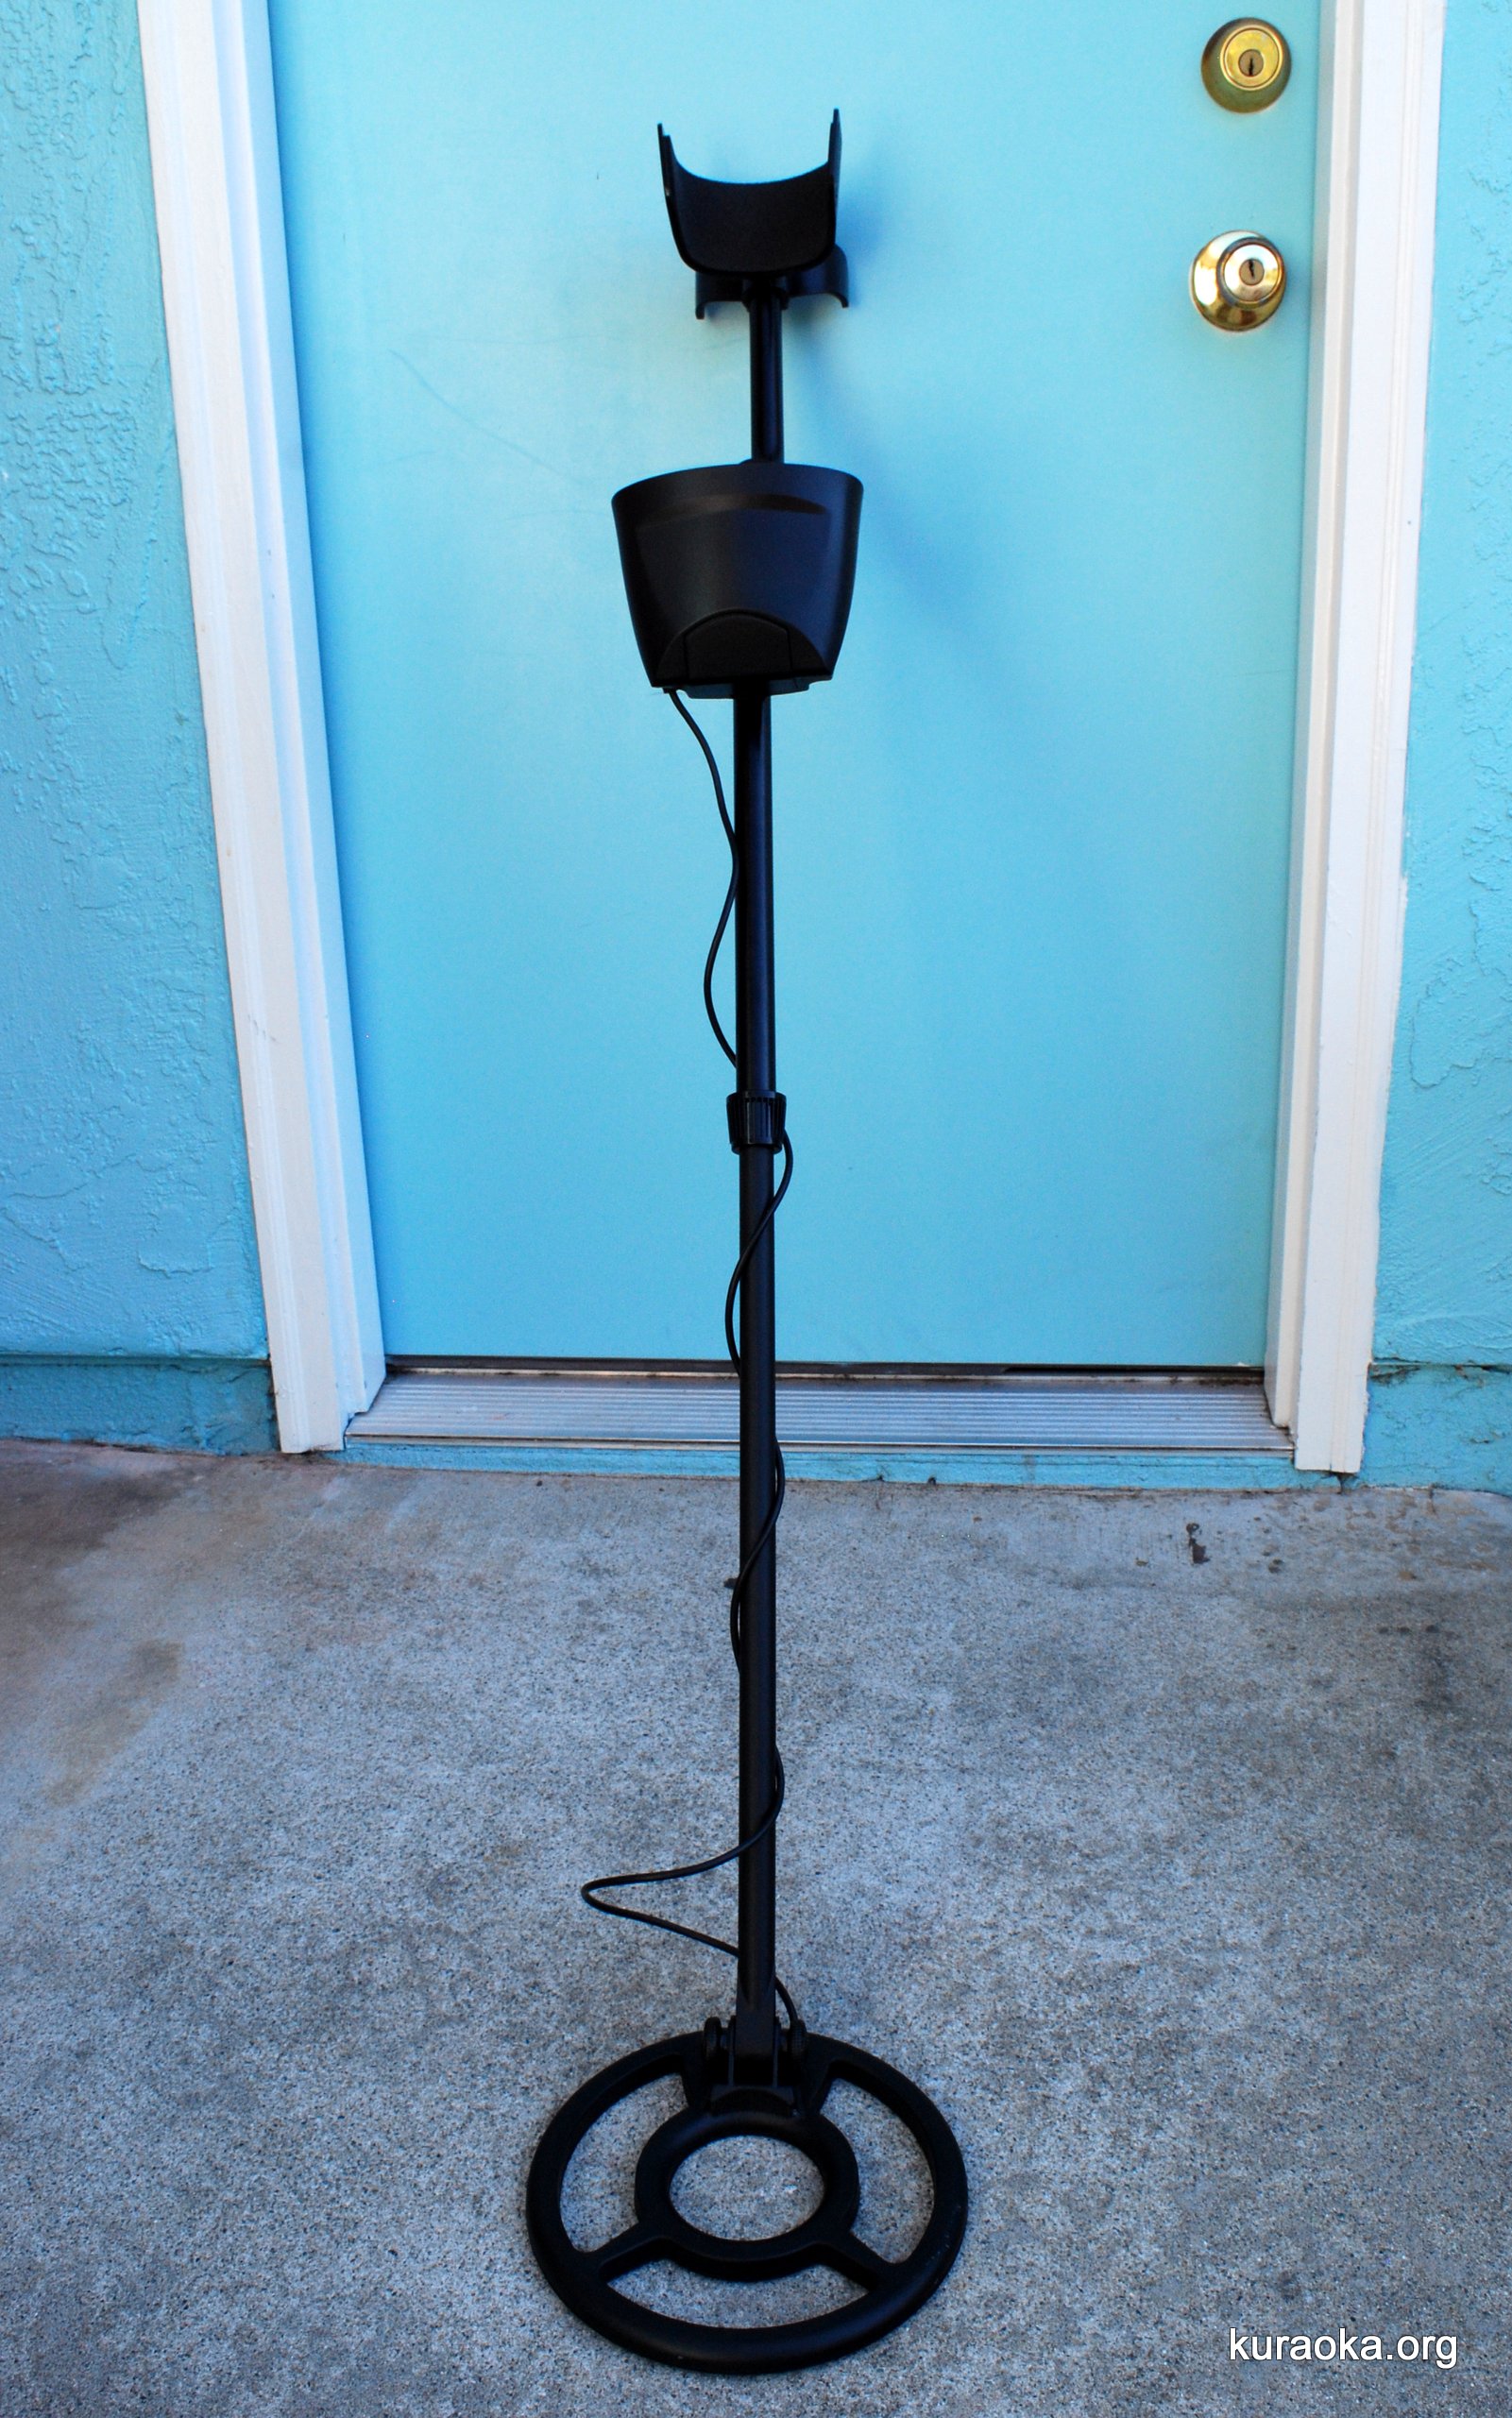
Bounty Hunter Elite 2200.
My first detector is a Bounty Hunter Elite 2200, which is the same as a Bounty Hunter Discovery 2200 but sold through
a different retail channel. I bought it used for $30, which is a screaming deal. Serious detectorists would consider the
Bounty Hunter Elite 2200 a low-end machine, but it's still a far more-capable detector than I am a detectorist.
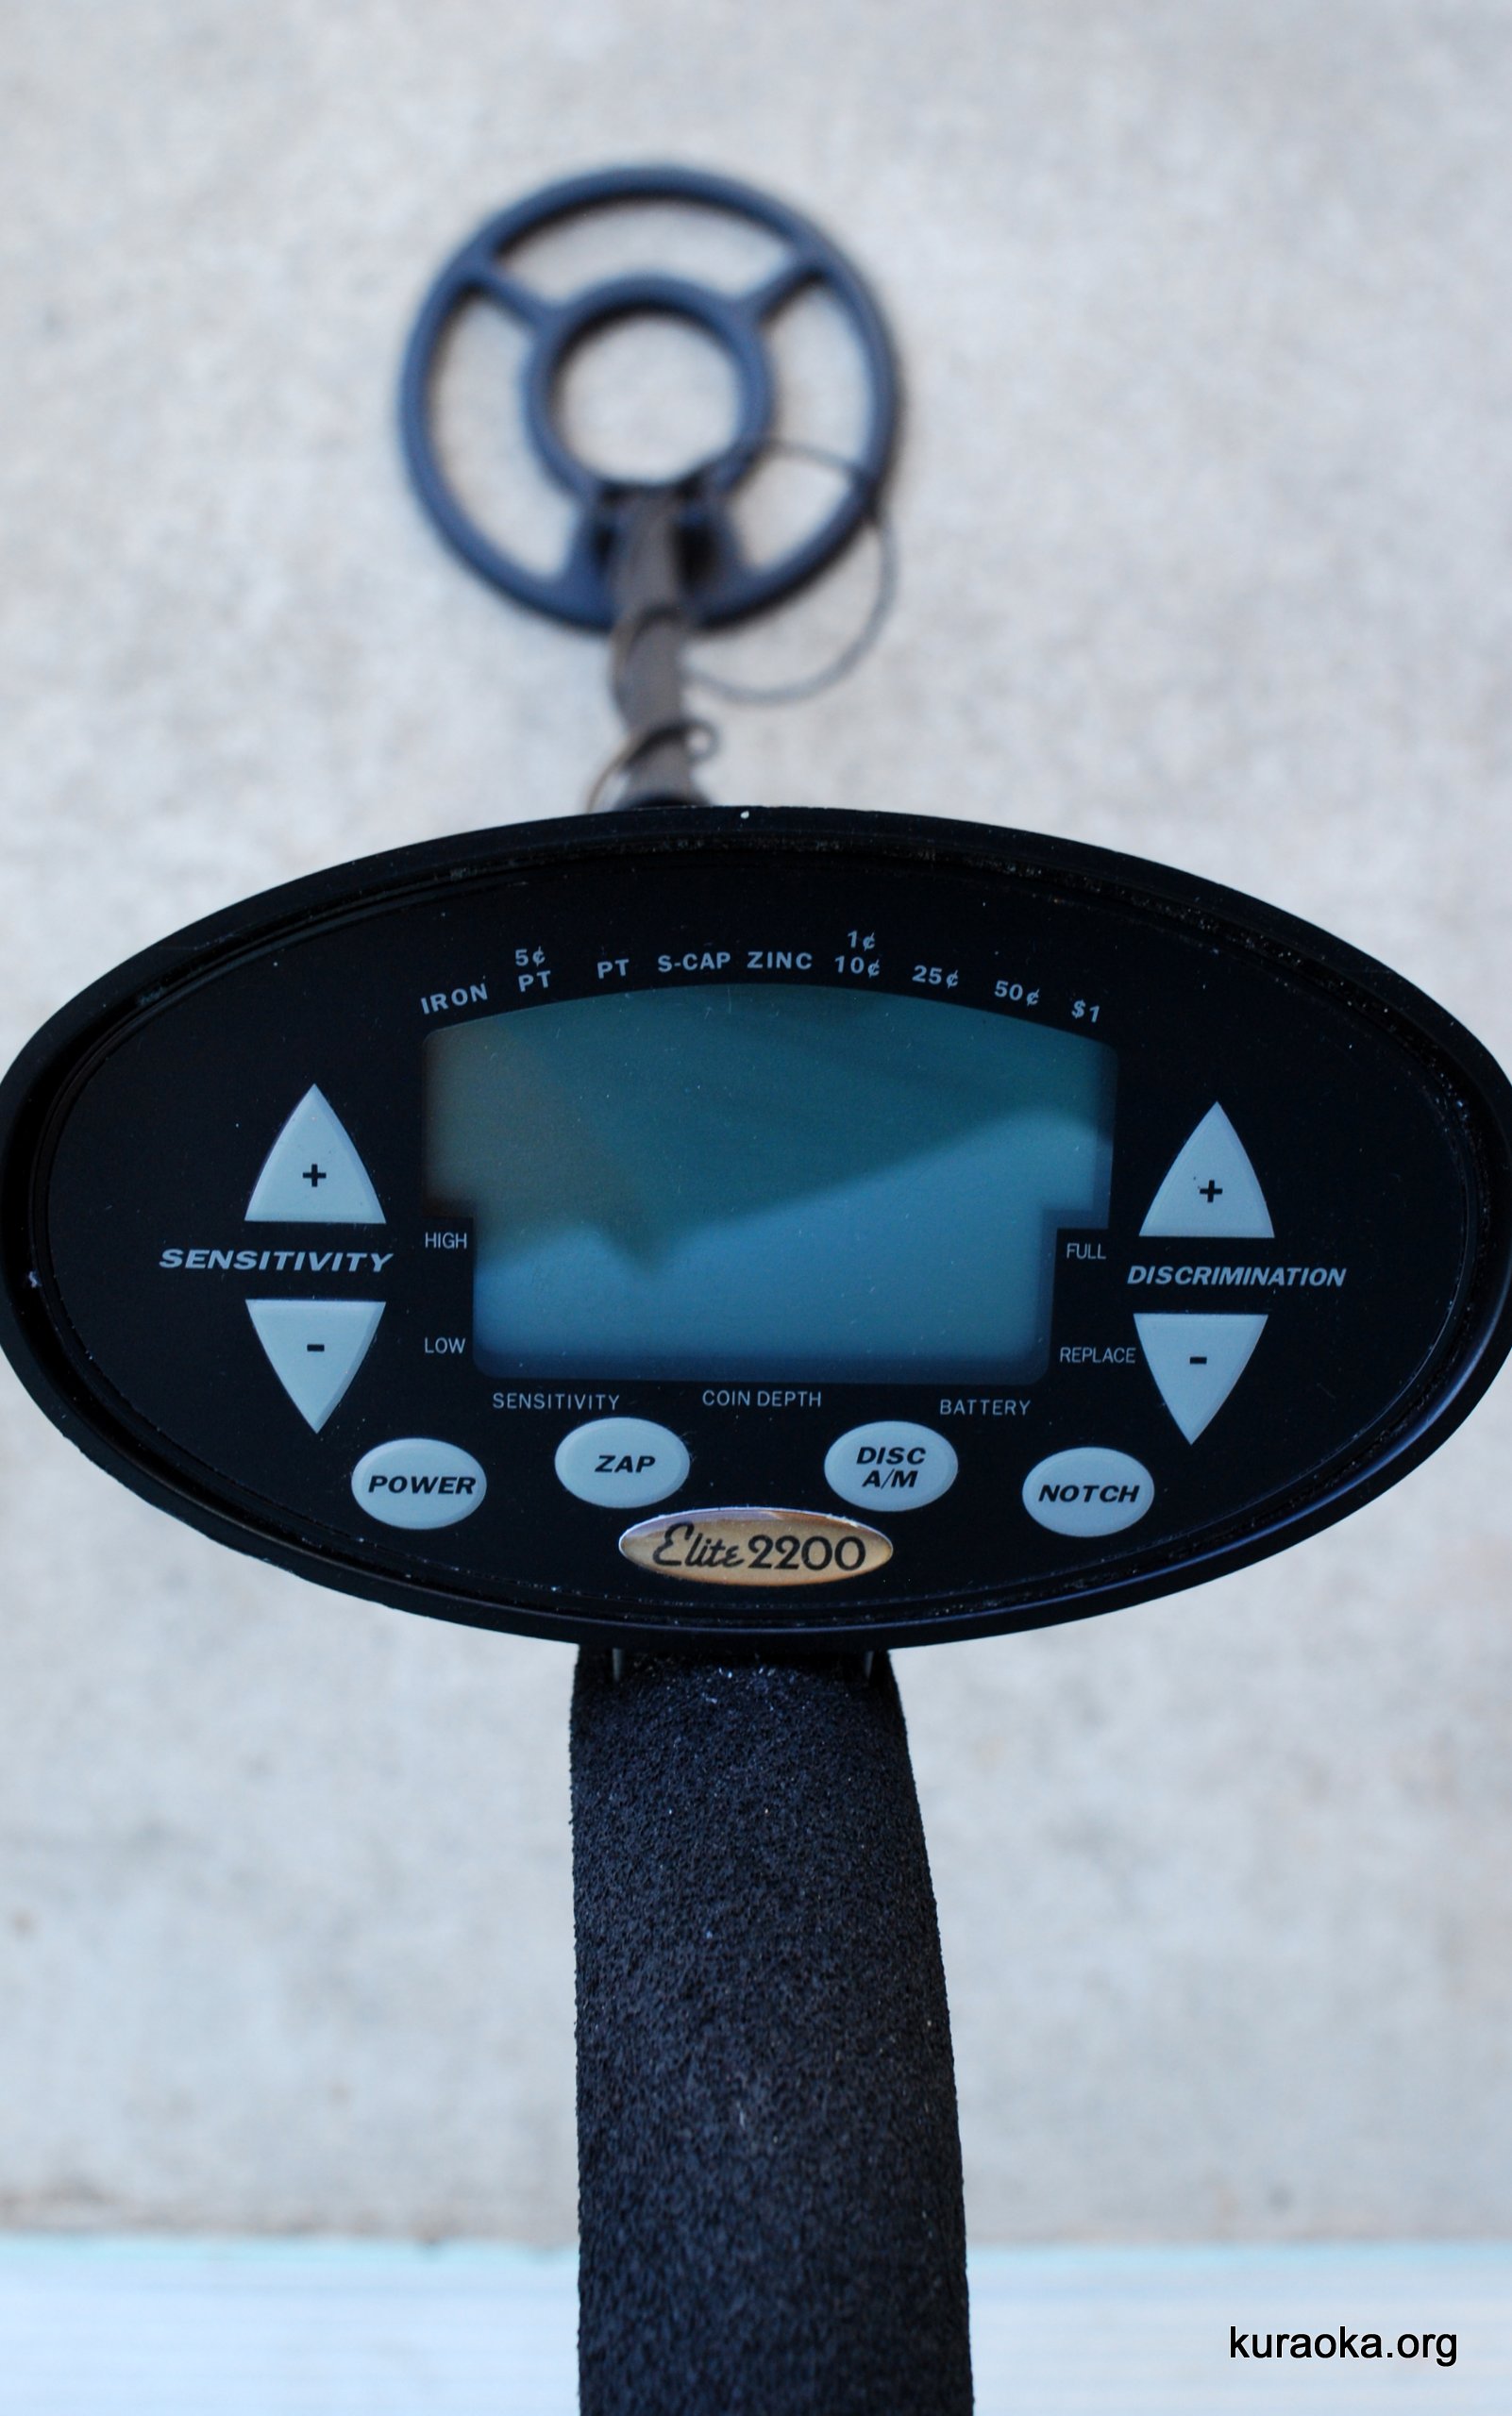
It has five sensitivity levels (0-4 bars), and can discriminate out (block) signals in batches or individually. The
display bunches signals into likely target types instead of giving a numerical signal strength index.
It has four distinct audio tones correlating roughly to iron and steel, pull tabs and nickels, zinc pennies and bottle caps,
and coins and silver. That said, many gold items have a magnetic field profile similar to pulltabs and zinc pennies. It's
my main detector, fitted with the 4" coil.
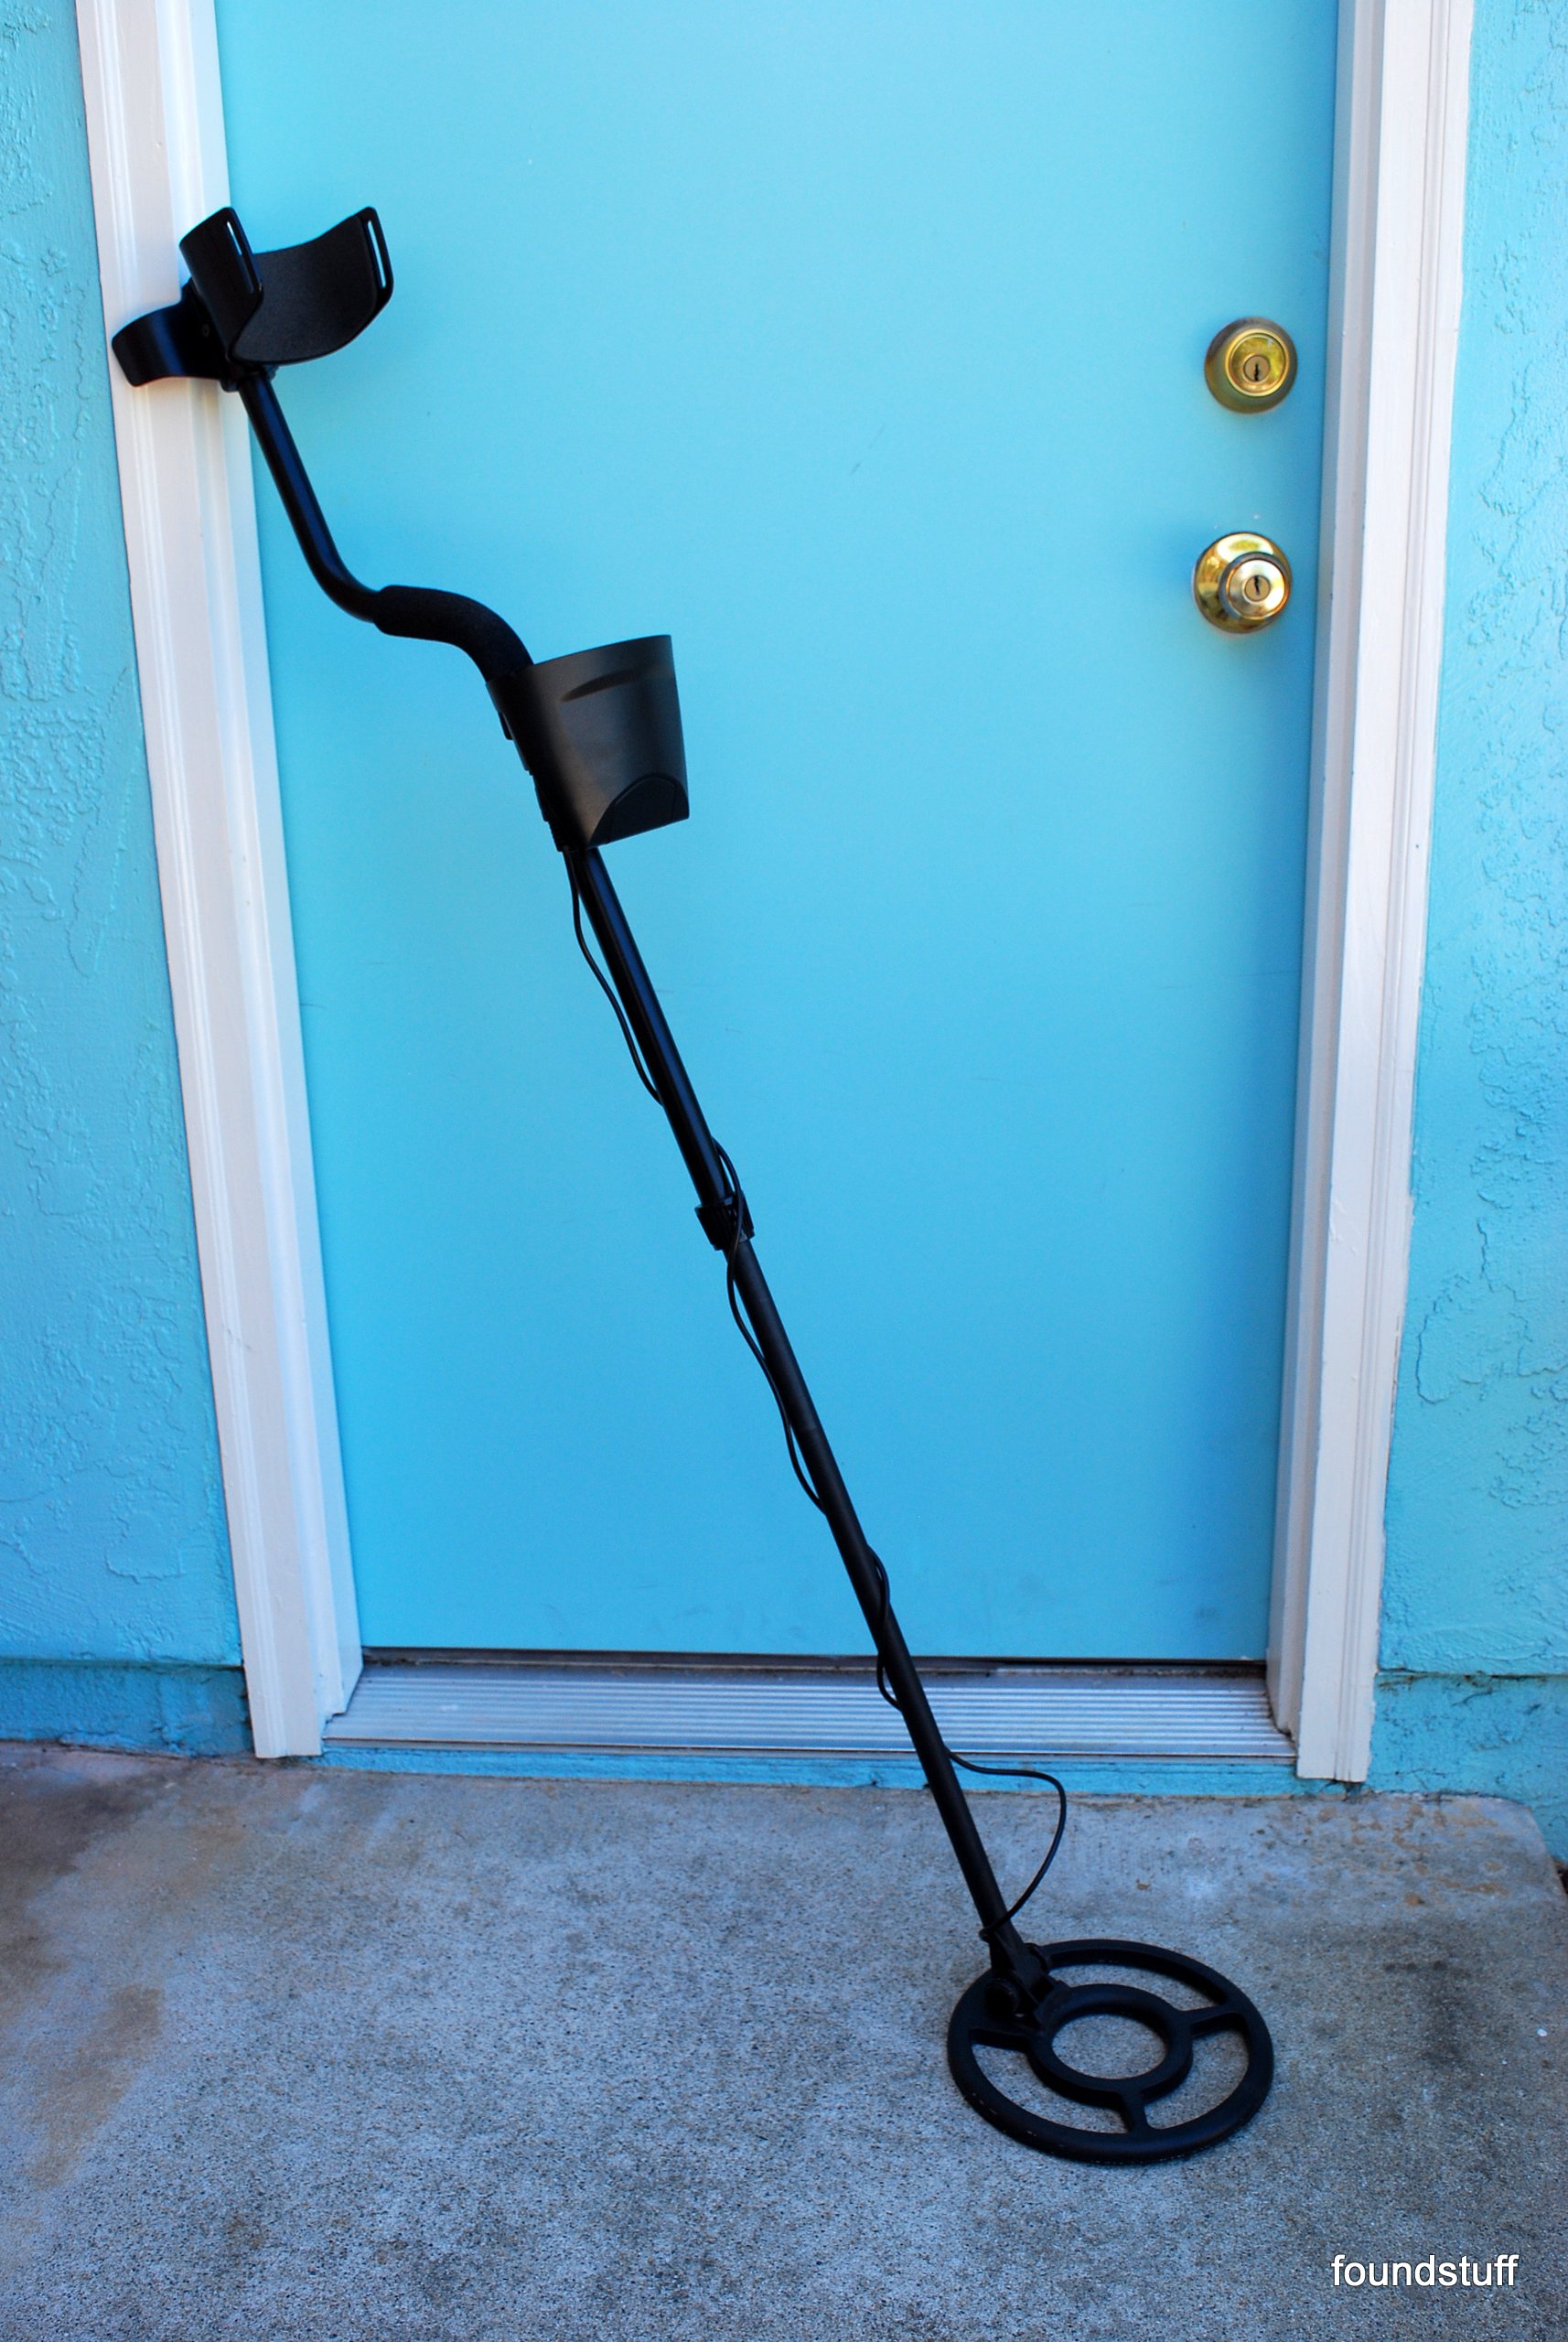
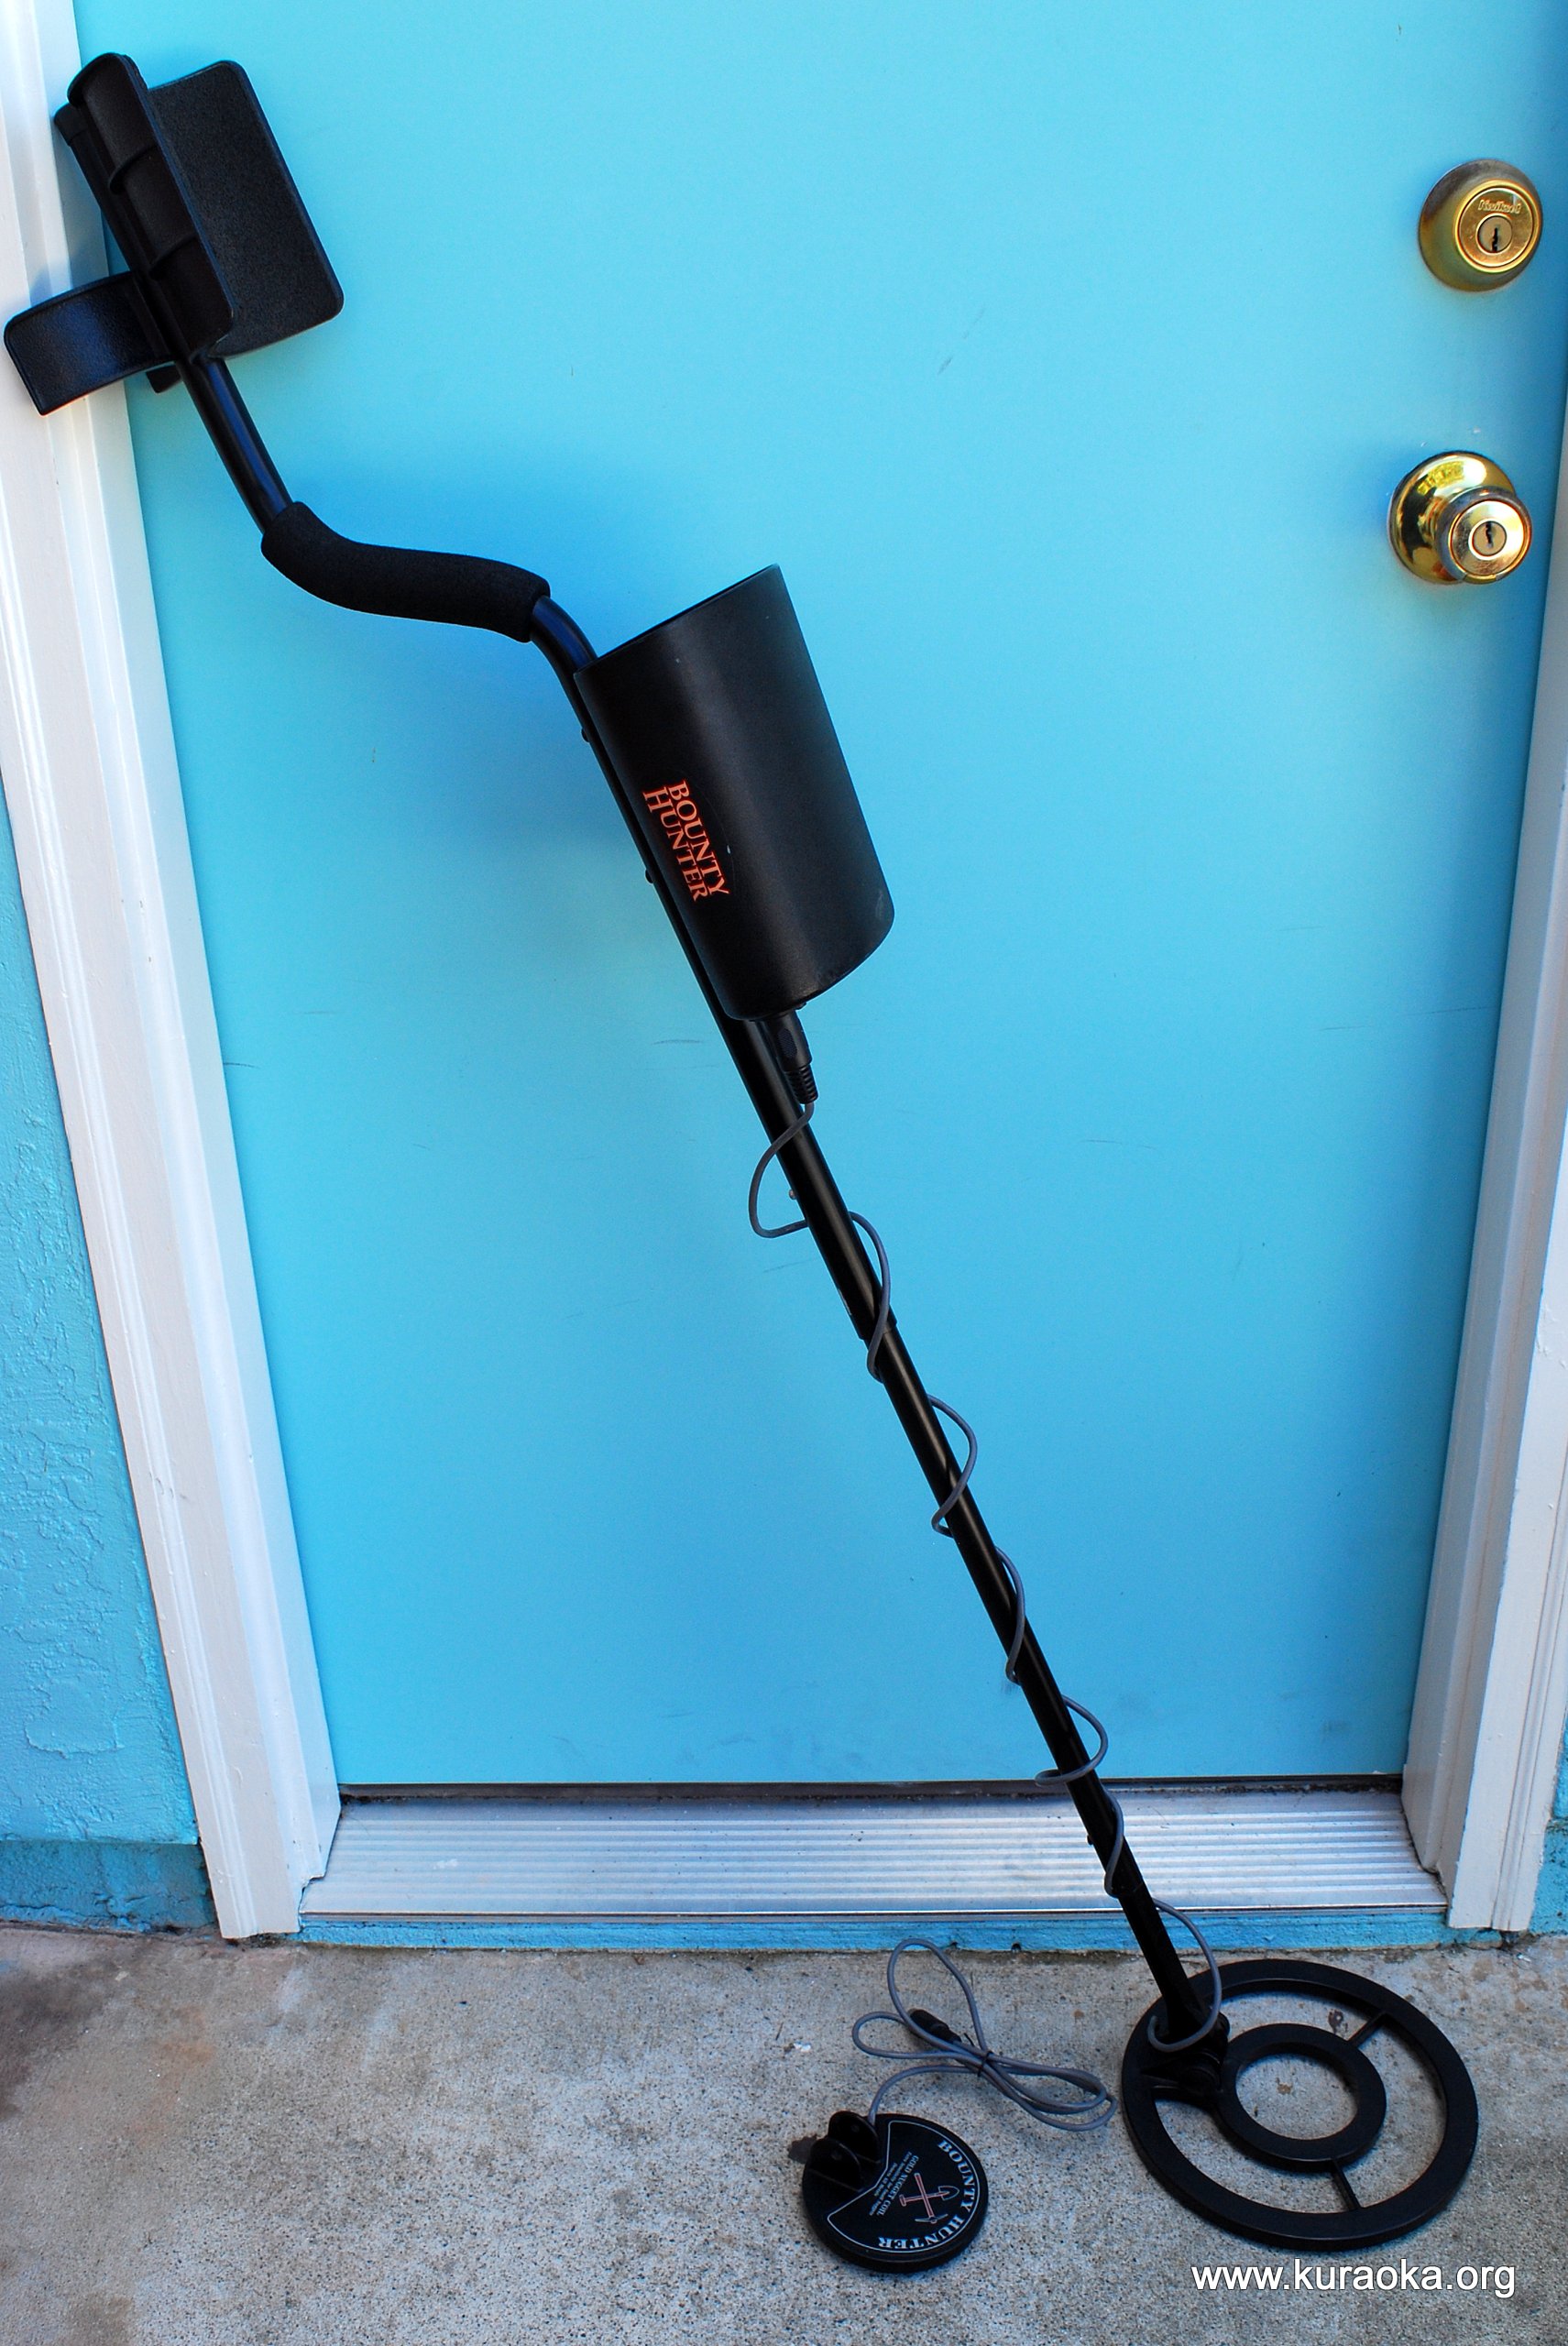
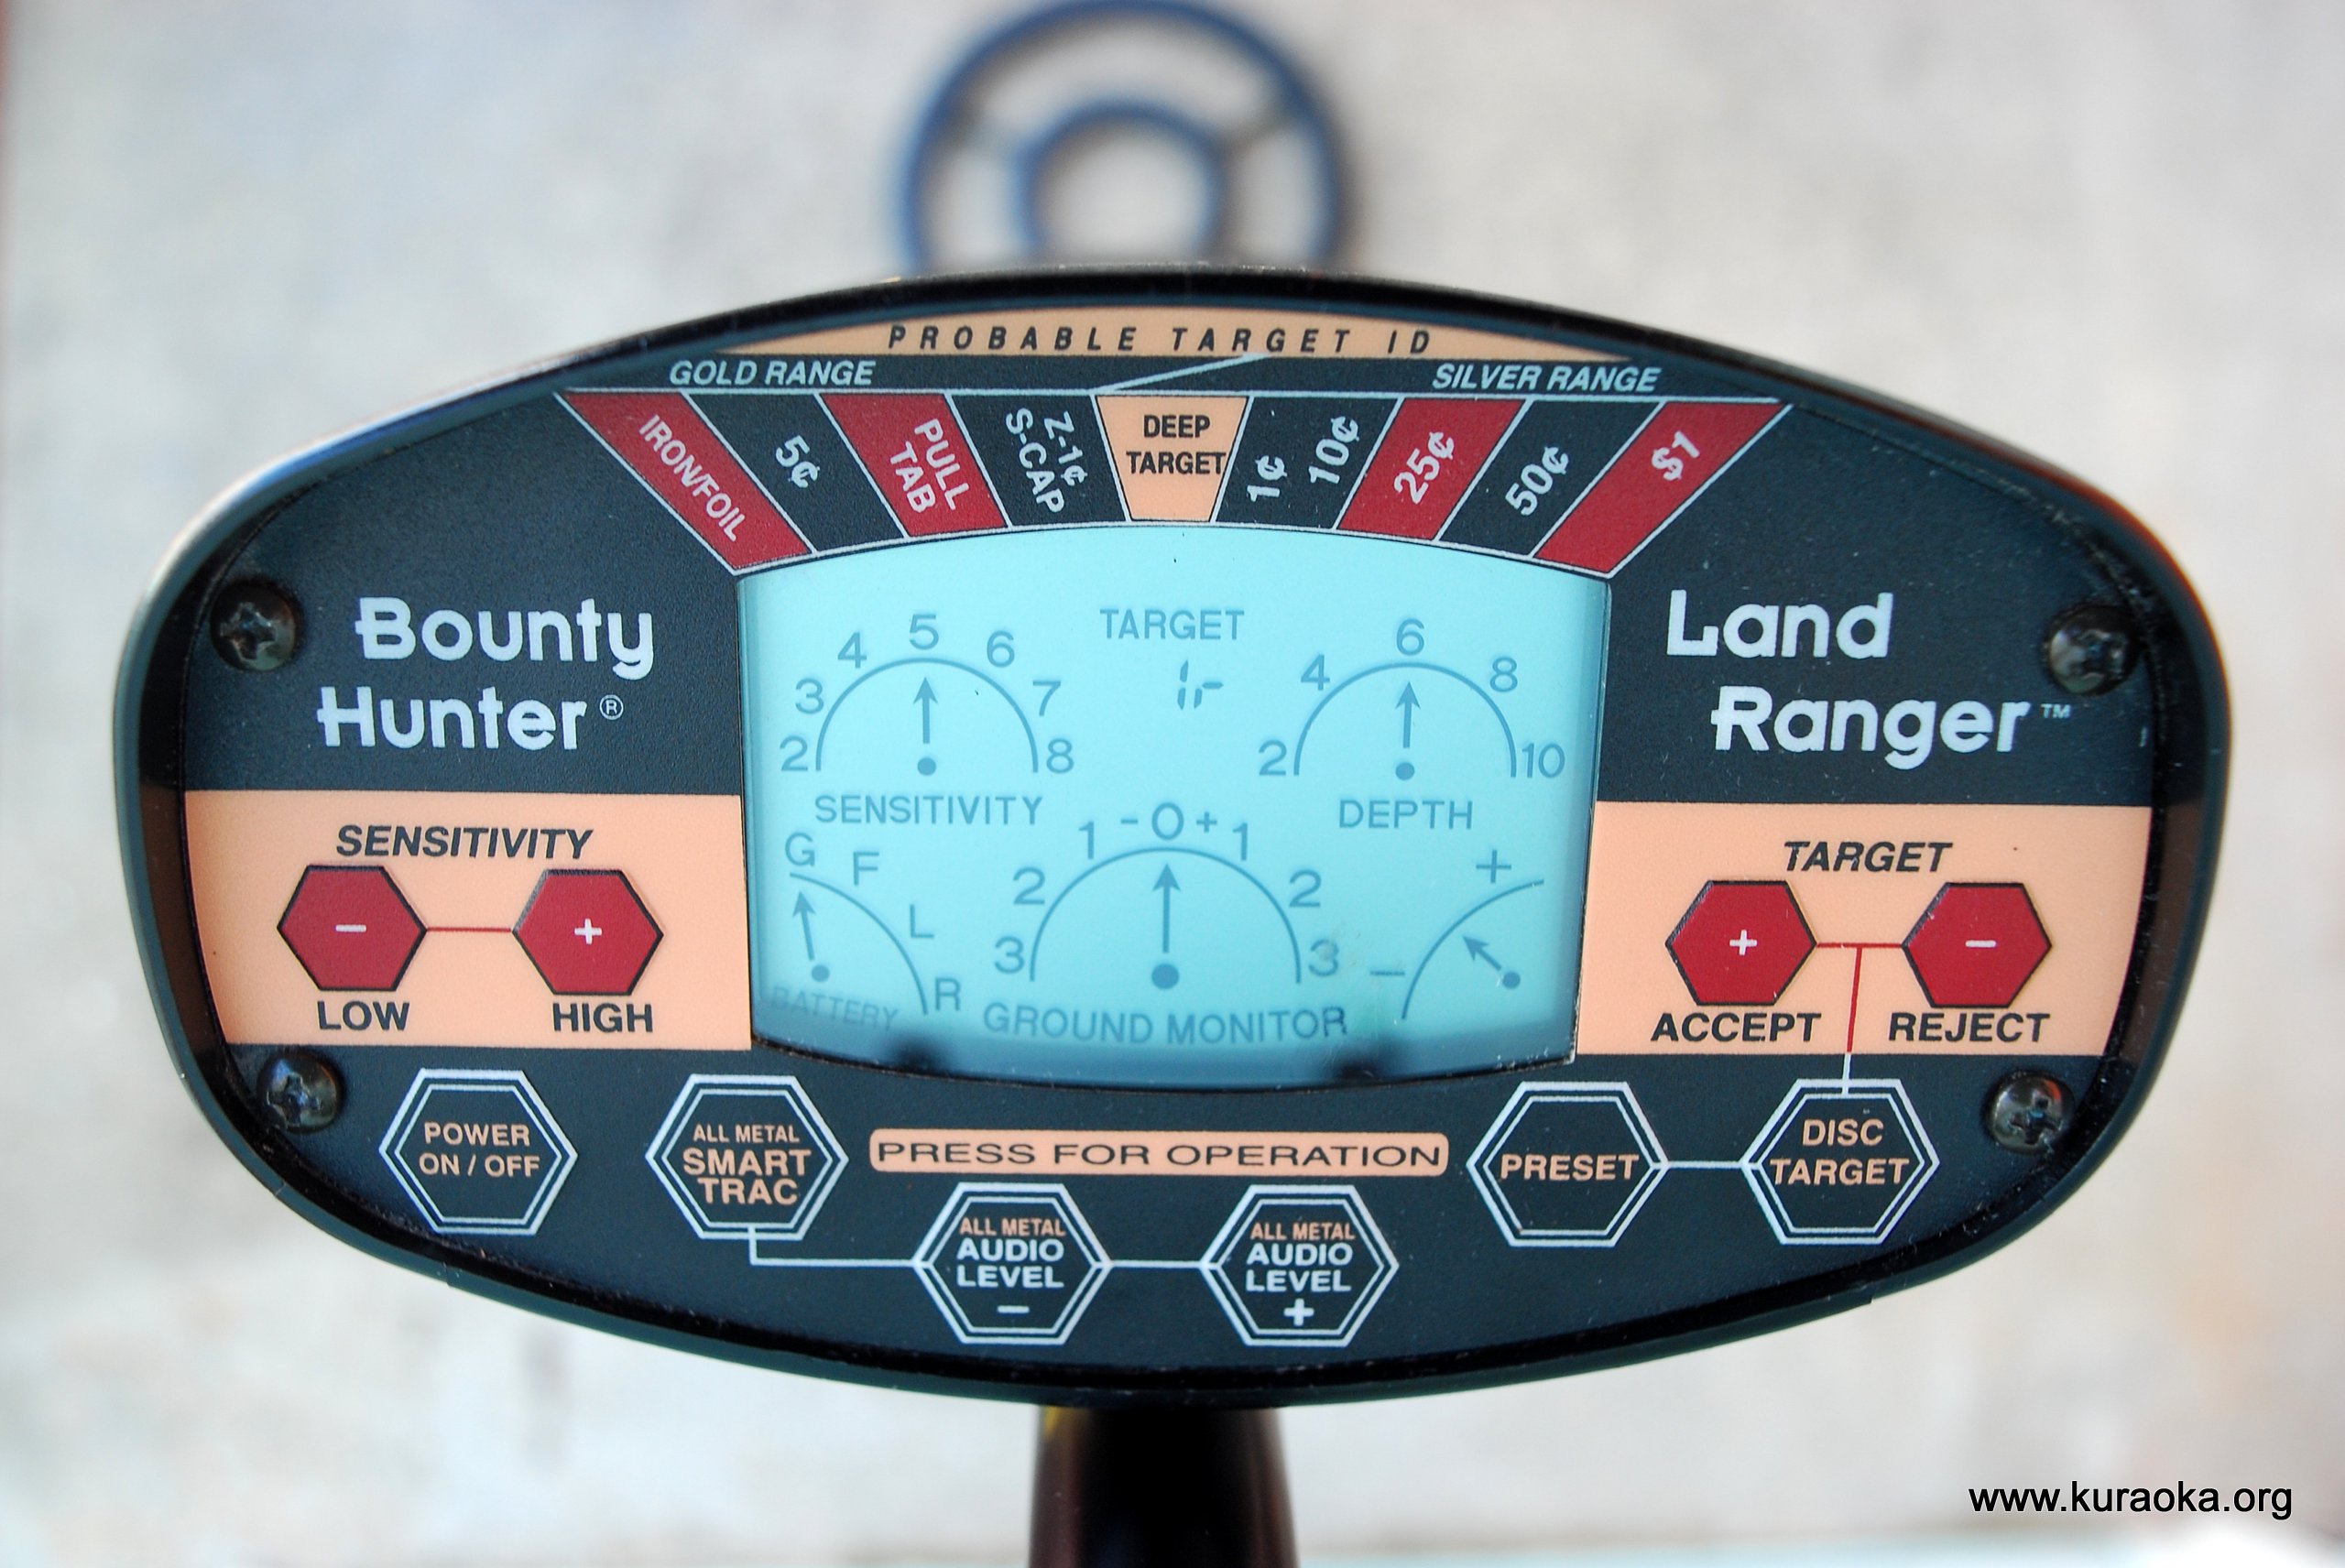
Bounty Hunter Land Ranger.
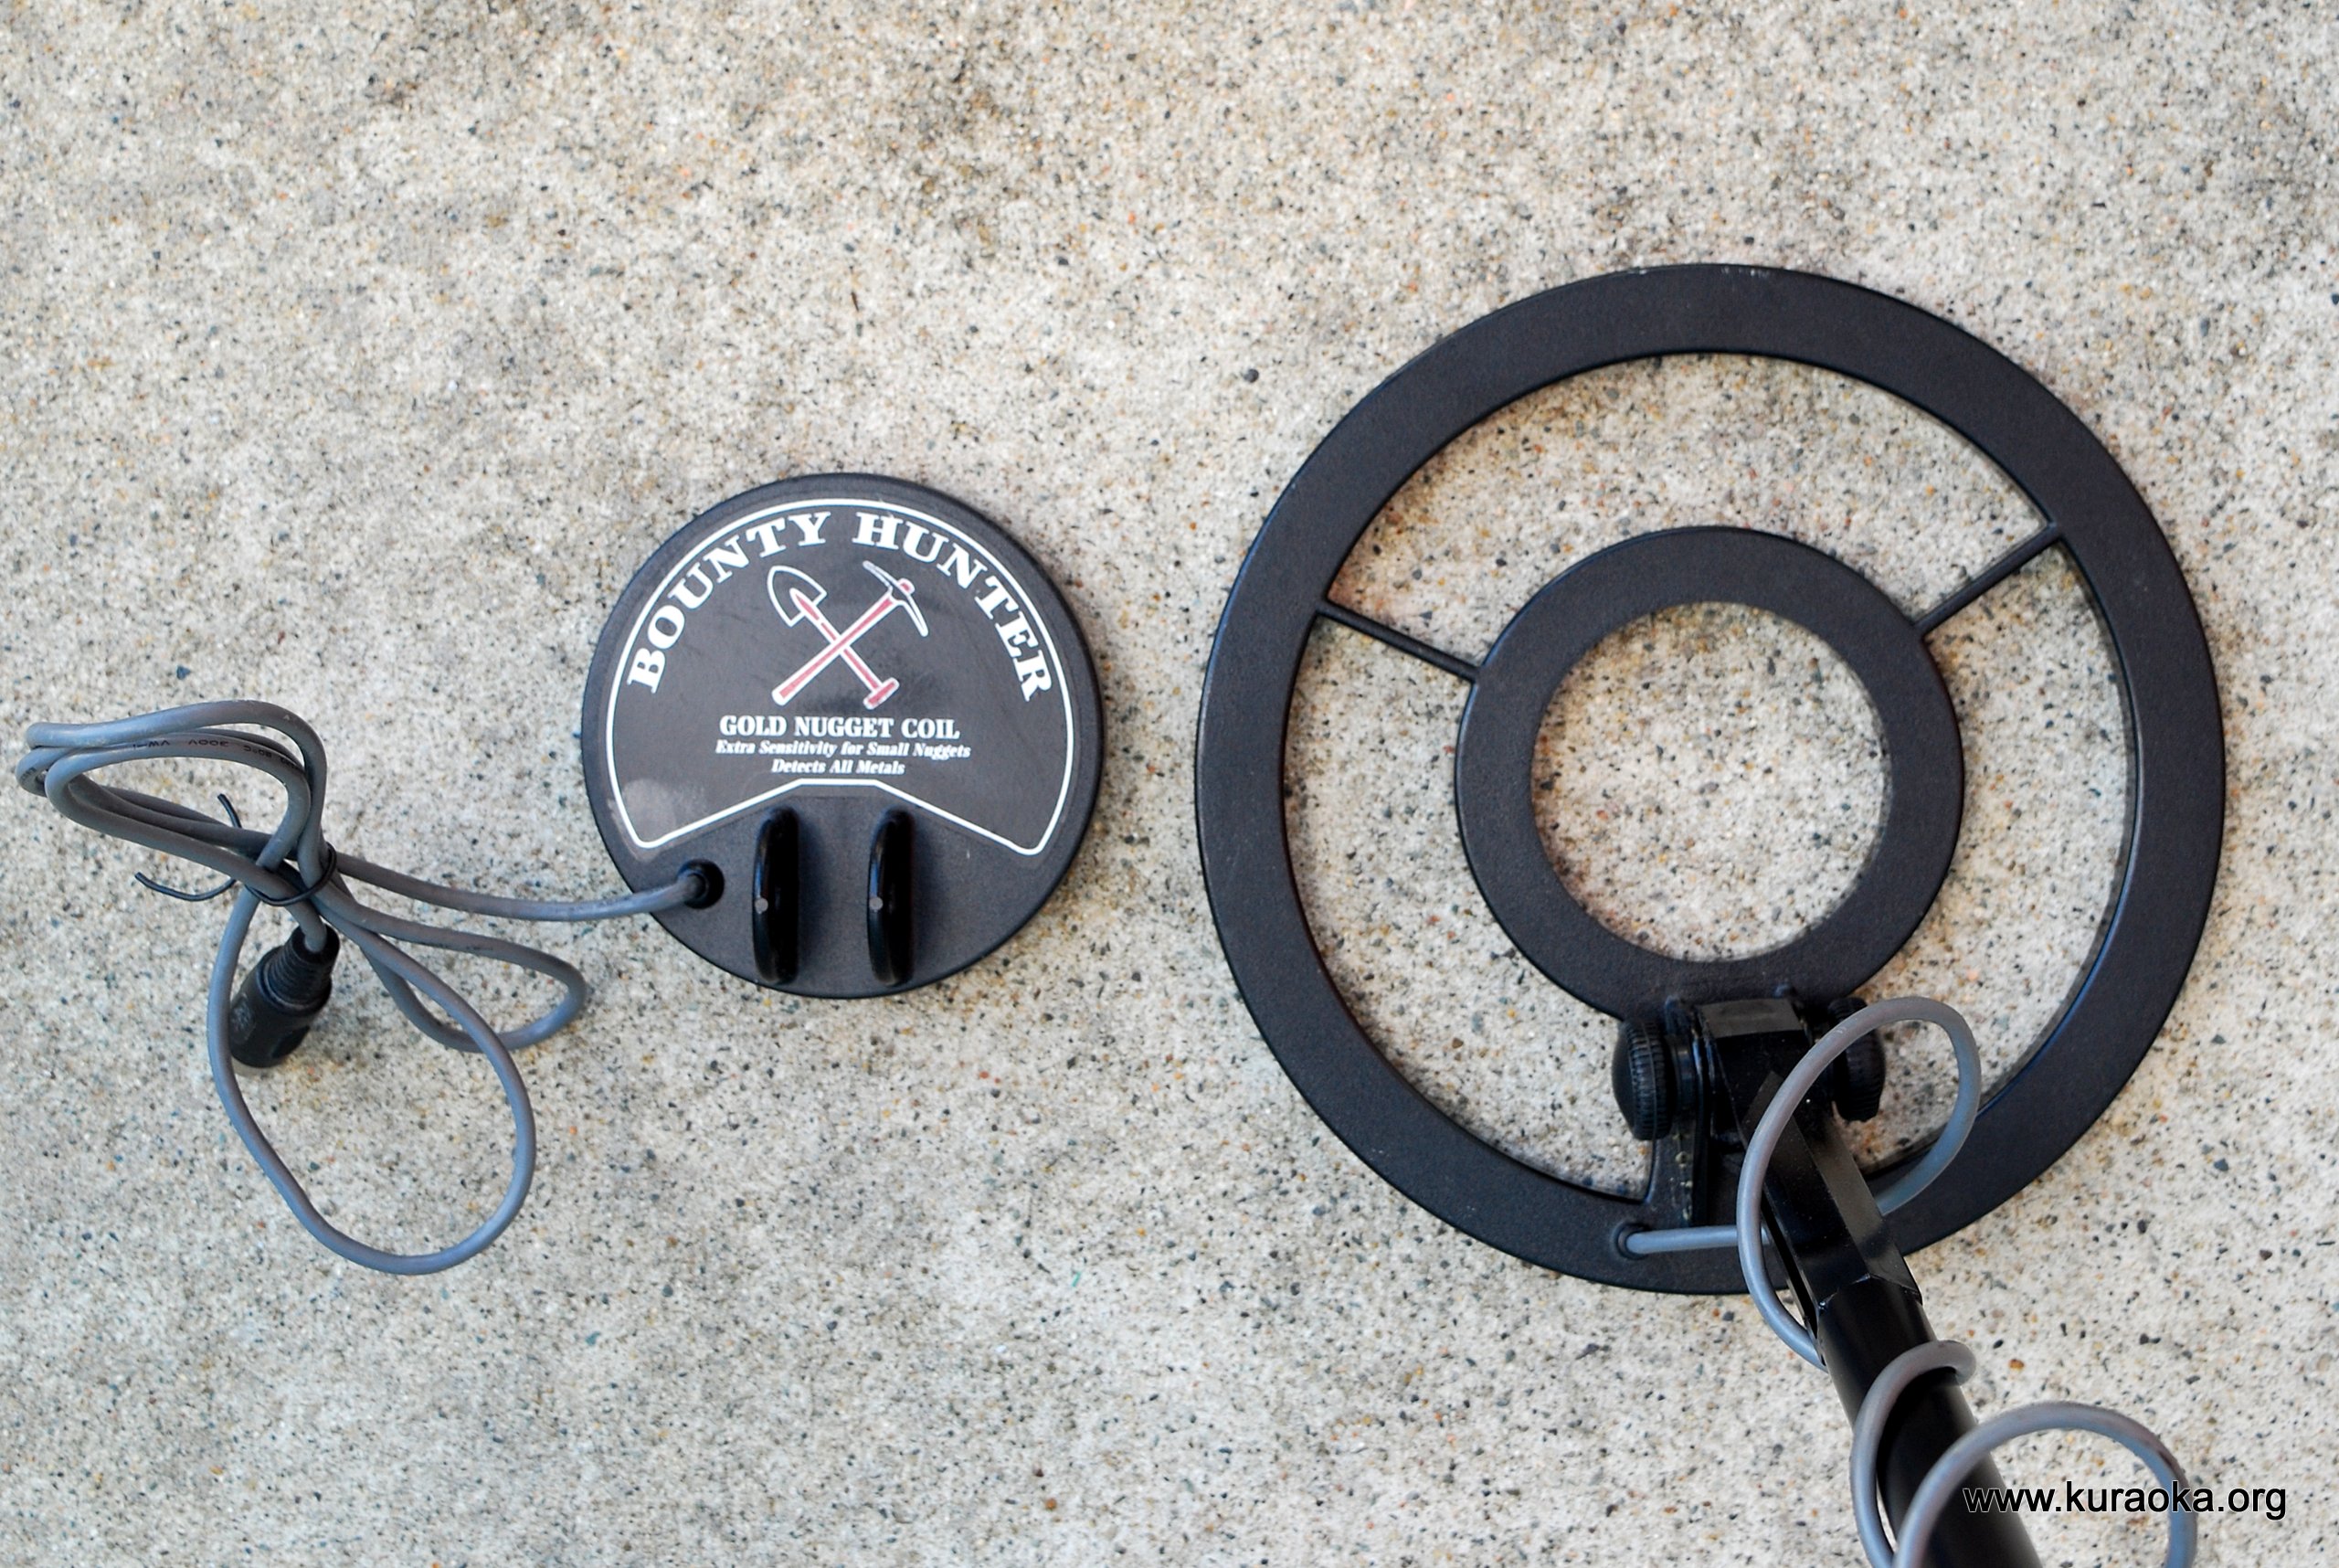
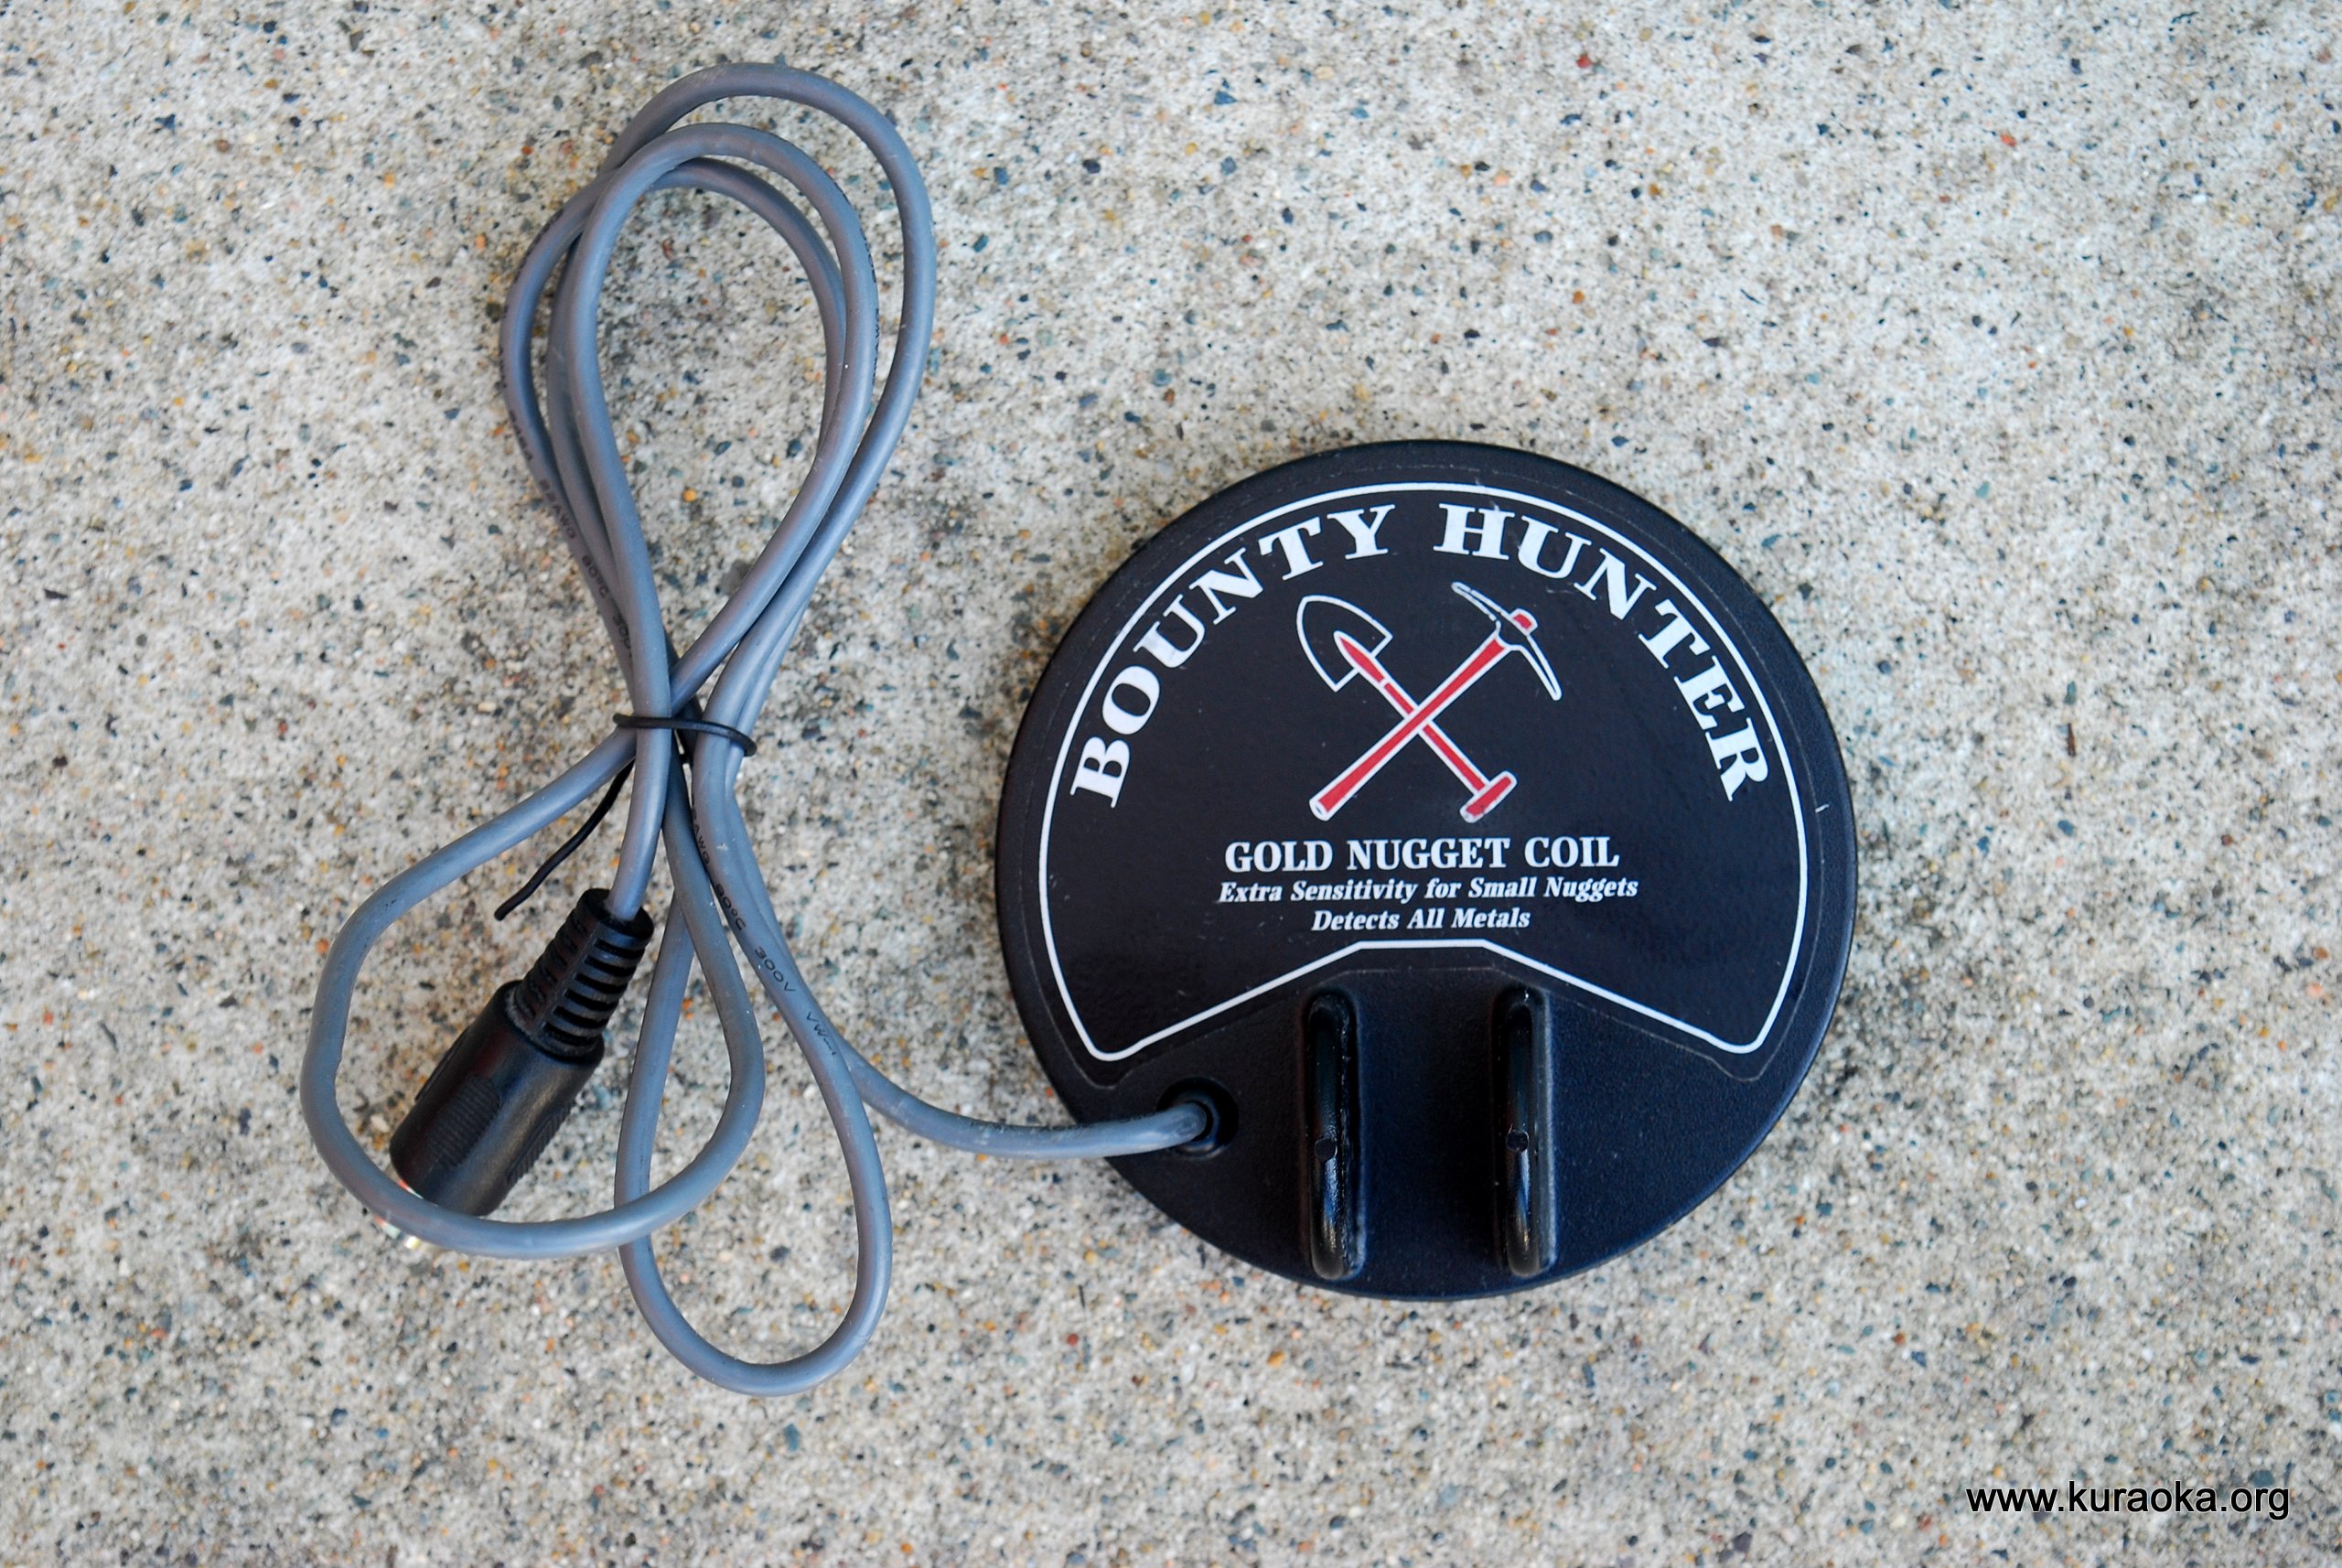
My second metal detector is a Bounty Hunter Land Ranger, an older model but still in many ways an upgrade from the Elite 2200.
I bought it used for $20 including the standard coil and four-inch "gold nugget" coil, another screaming deal. In bargain hunting, as
with metal detecting, patience pays! It has a numeric target identification system (1-299) in addition to the probable target pointer
band, seven sensitivity levels, a true all-metal mode, several pre-set discrimination modes in addition to being able to discriminate
individually, and three iron rejection levels. It has three audio tones correlating roughly to gold/nickels, pull tabs, and
copper/silver/bronze. With the 4" coil, it was my main detector until a battery wire broke in a spot where I can't tape-splice
it, so it's waiting for me to have time to do a proper repair job.
The coils use a standard Bounty Hunter five-pin plug, so they'll work on the Elite 2200 too.
For more about the differences between the two detectors and tips for getting the most out of them, check out my Bounty Hunter Elite 2200 vs Bounty Hunter Land Ranger page.
General detecting tips:
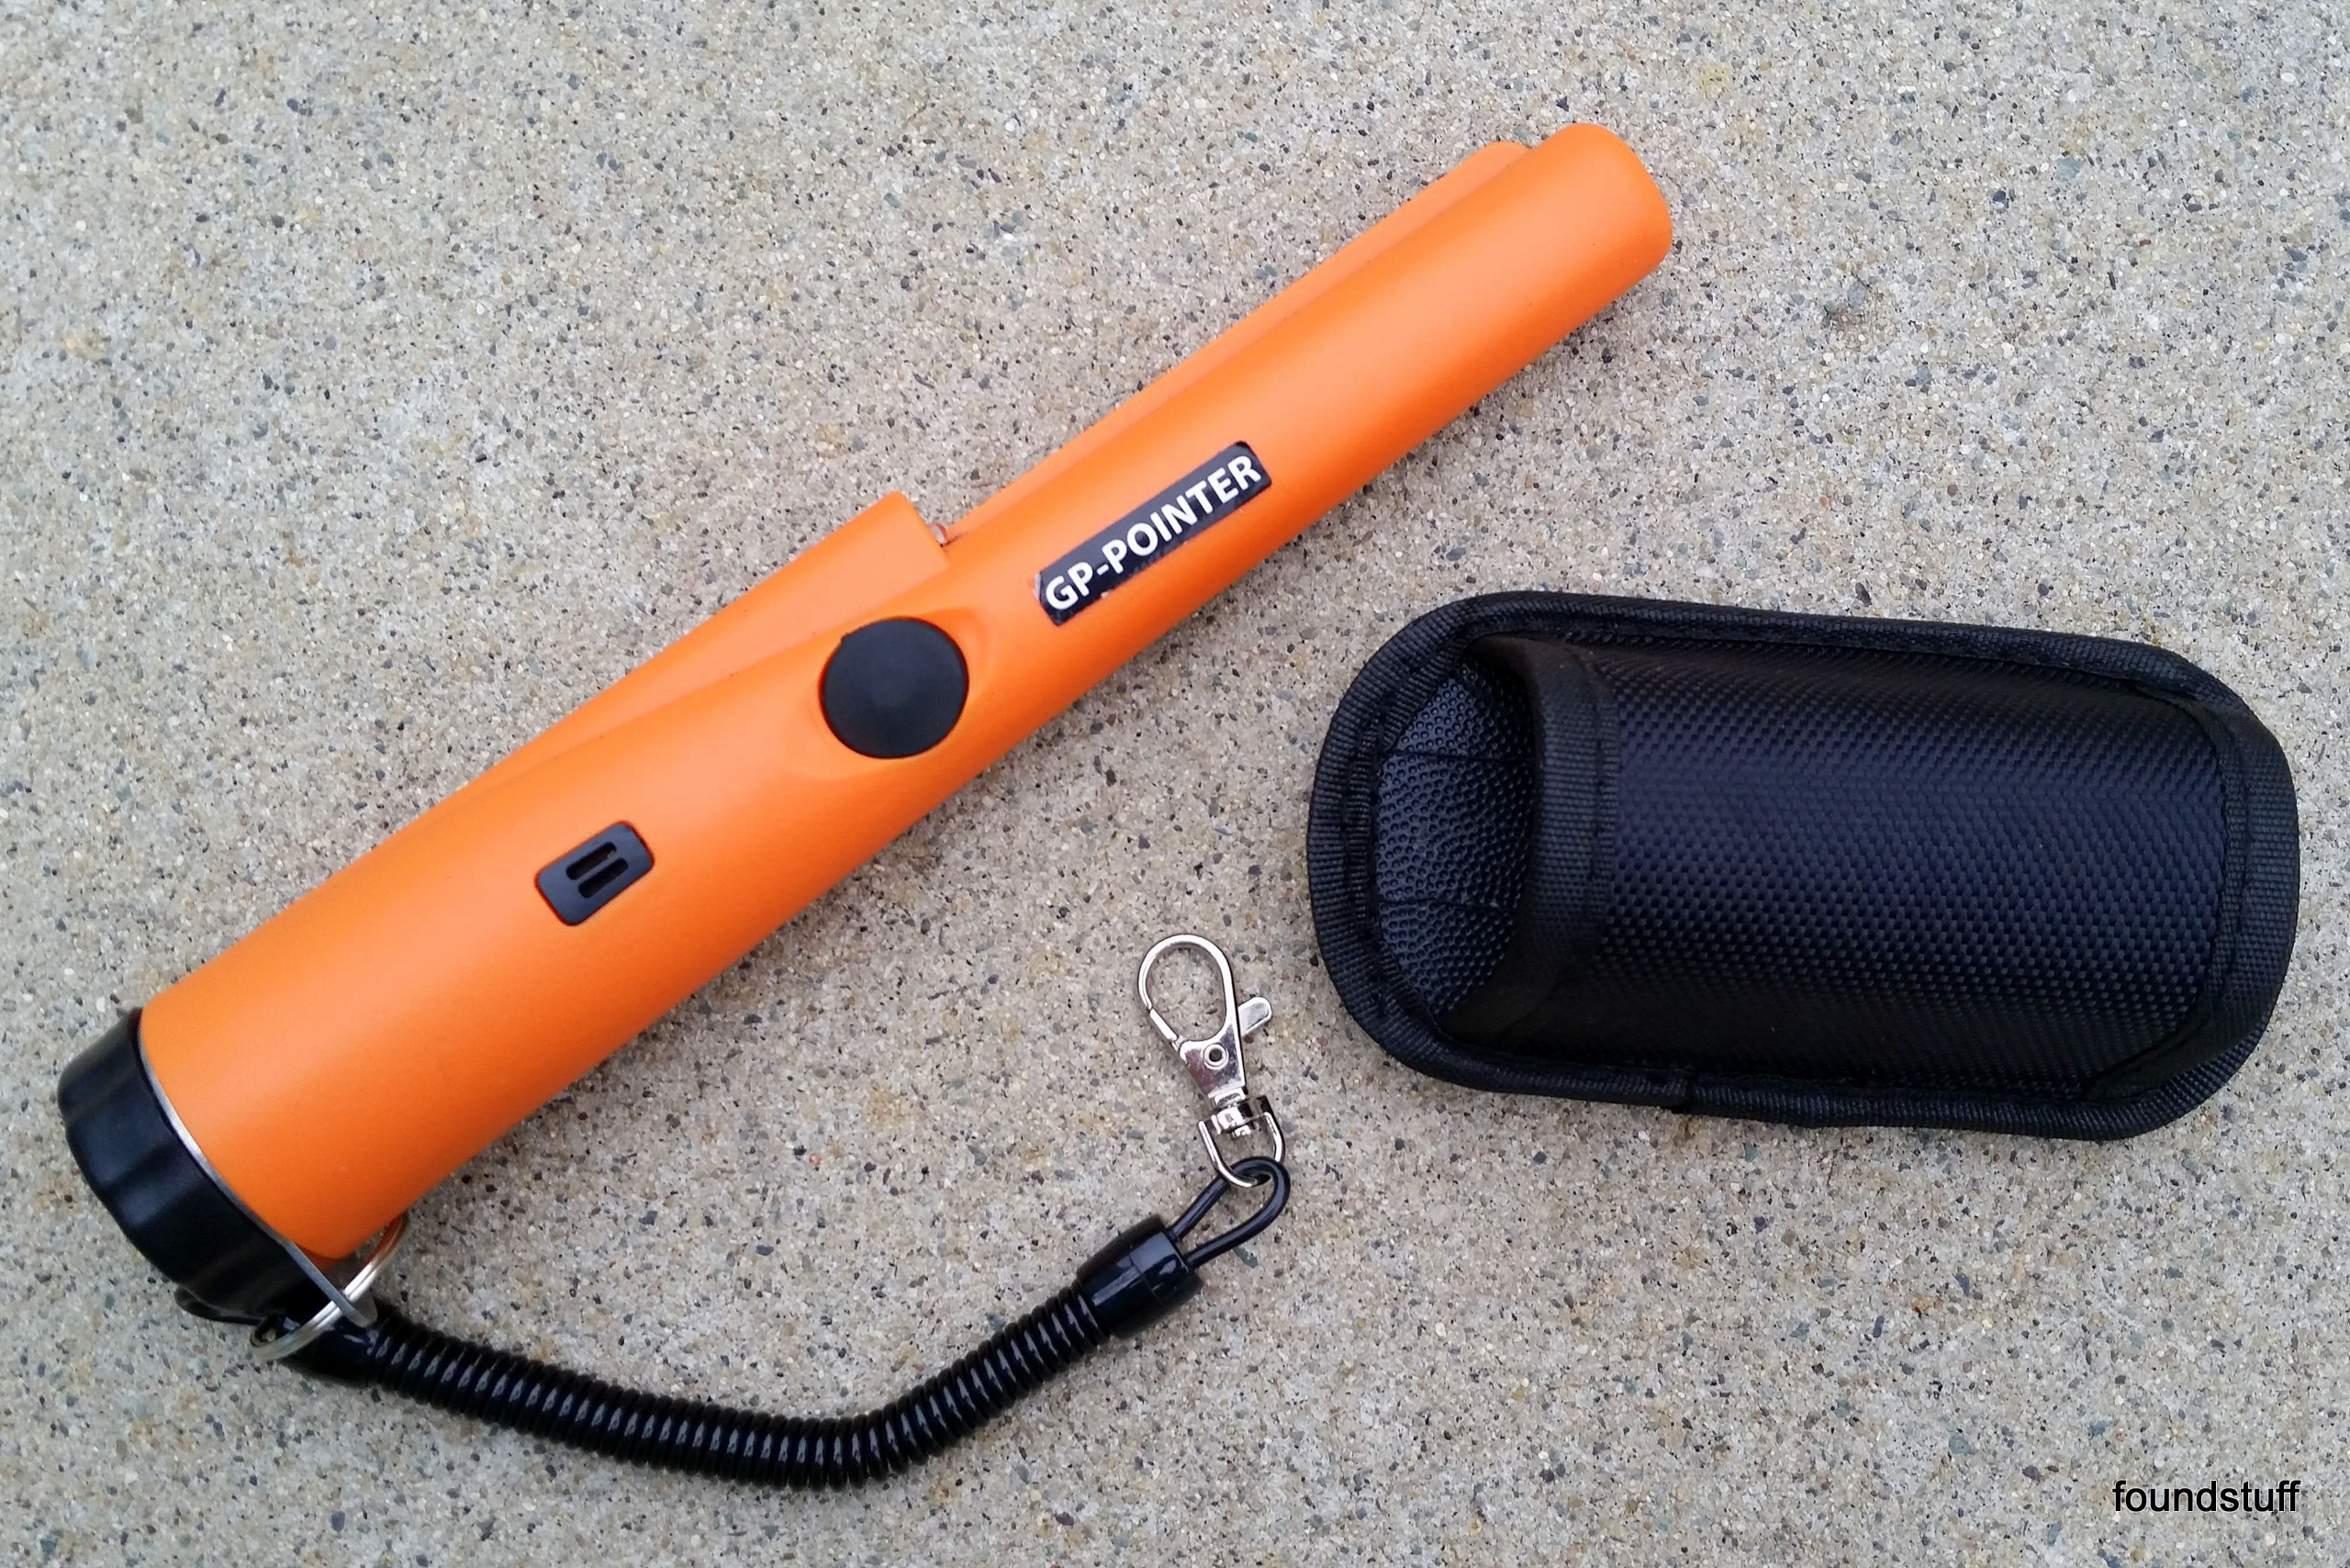
GP Pinpointer.
I bought this inexpensive (sub-$30) GP pinpointer from eBay, which was shipped directly from China. Strictly speaking, it's not a
Garrett Carrot clone, because it's not trying to fool anyone: the switch is different, the speaker port is different, it's not
fully waterproof, and its sensitivity isn't as good. But, in a pinpointer, I think less depth is actually a good thing. I really
like it, especially the side-scanning ability! I learned that it prefers alkaline batteries to rechargeables. I clip the telescoping
cord to my bag, and have plenty of reach for working. I've found that it needs to be in direct contact with the soil to do its thing;
waving it over the grass will only locate surface finds, even if you're touching the grass with it.
I don't dig in parks!
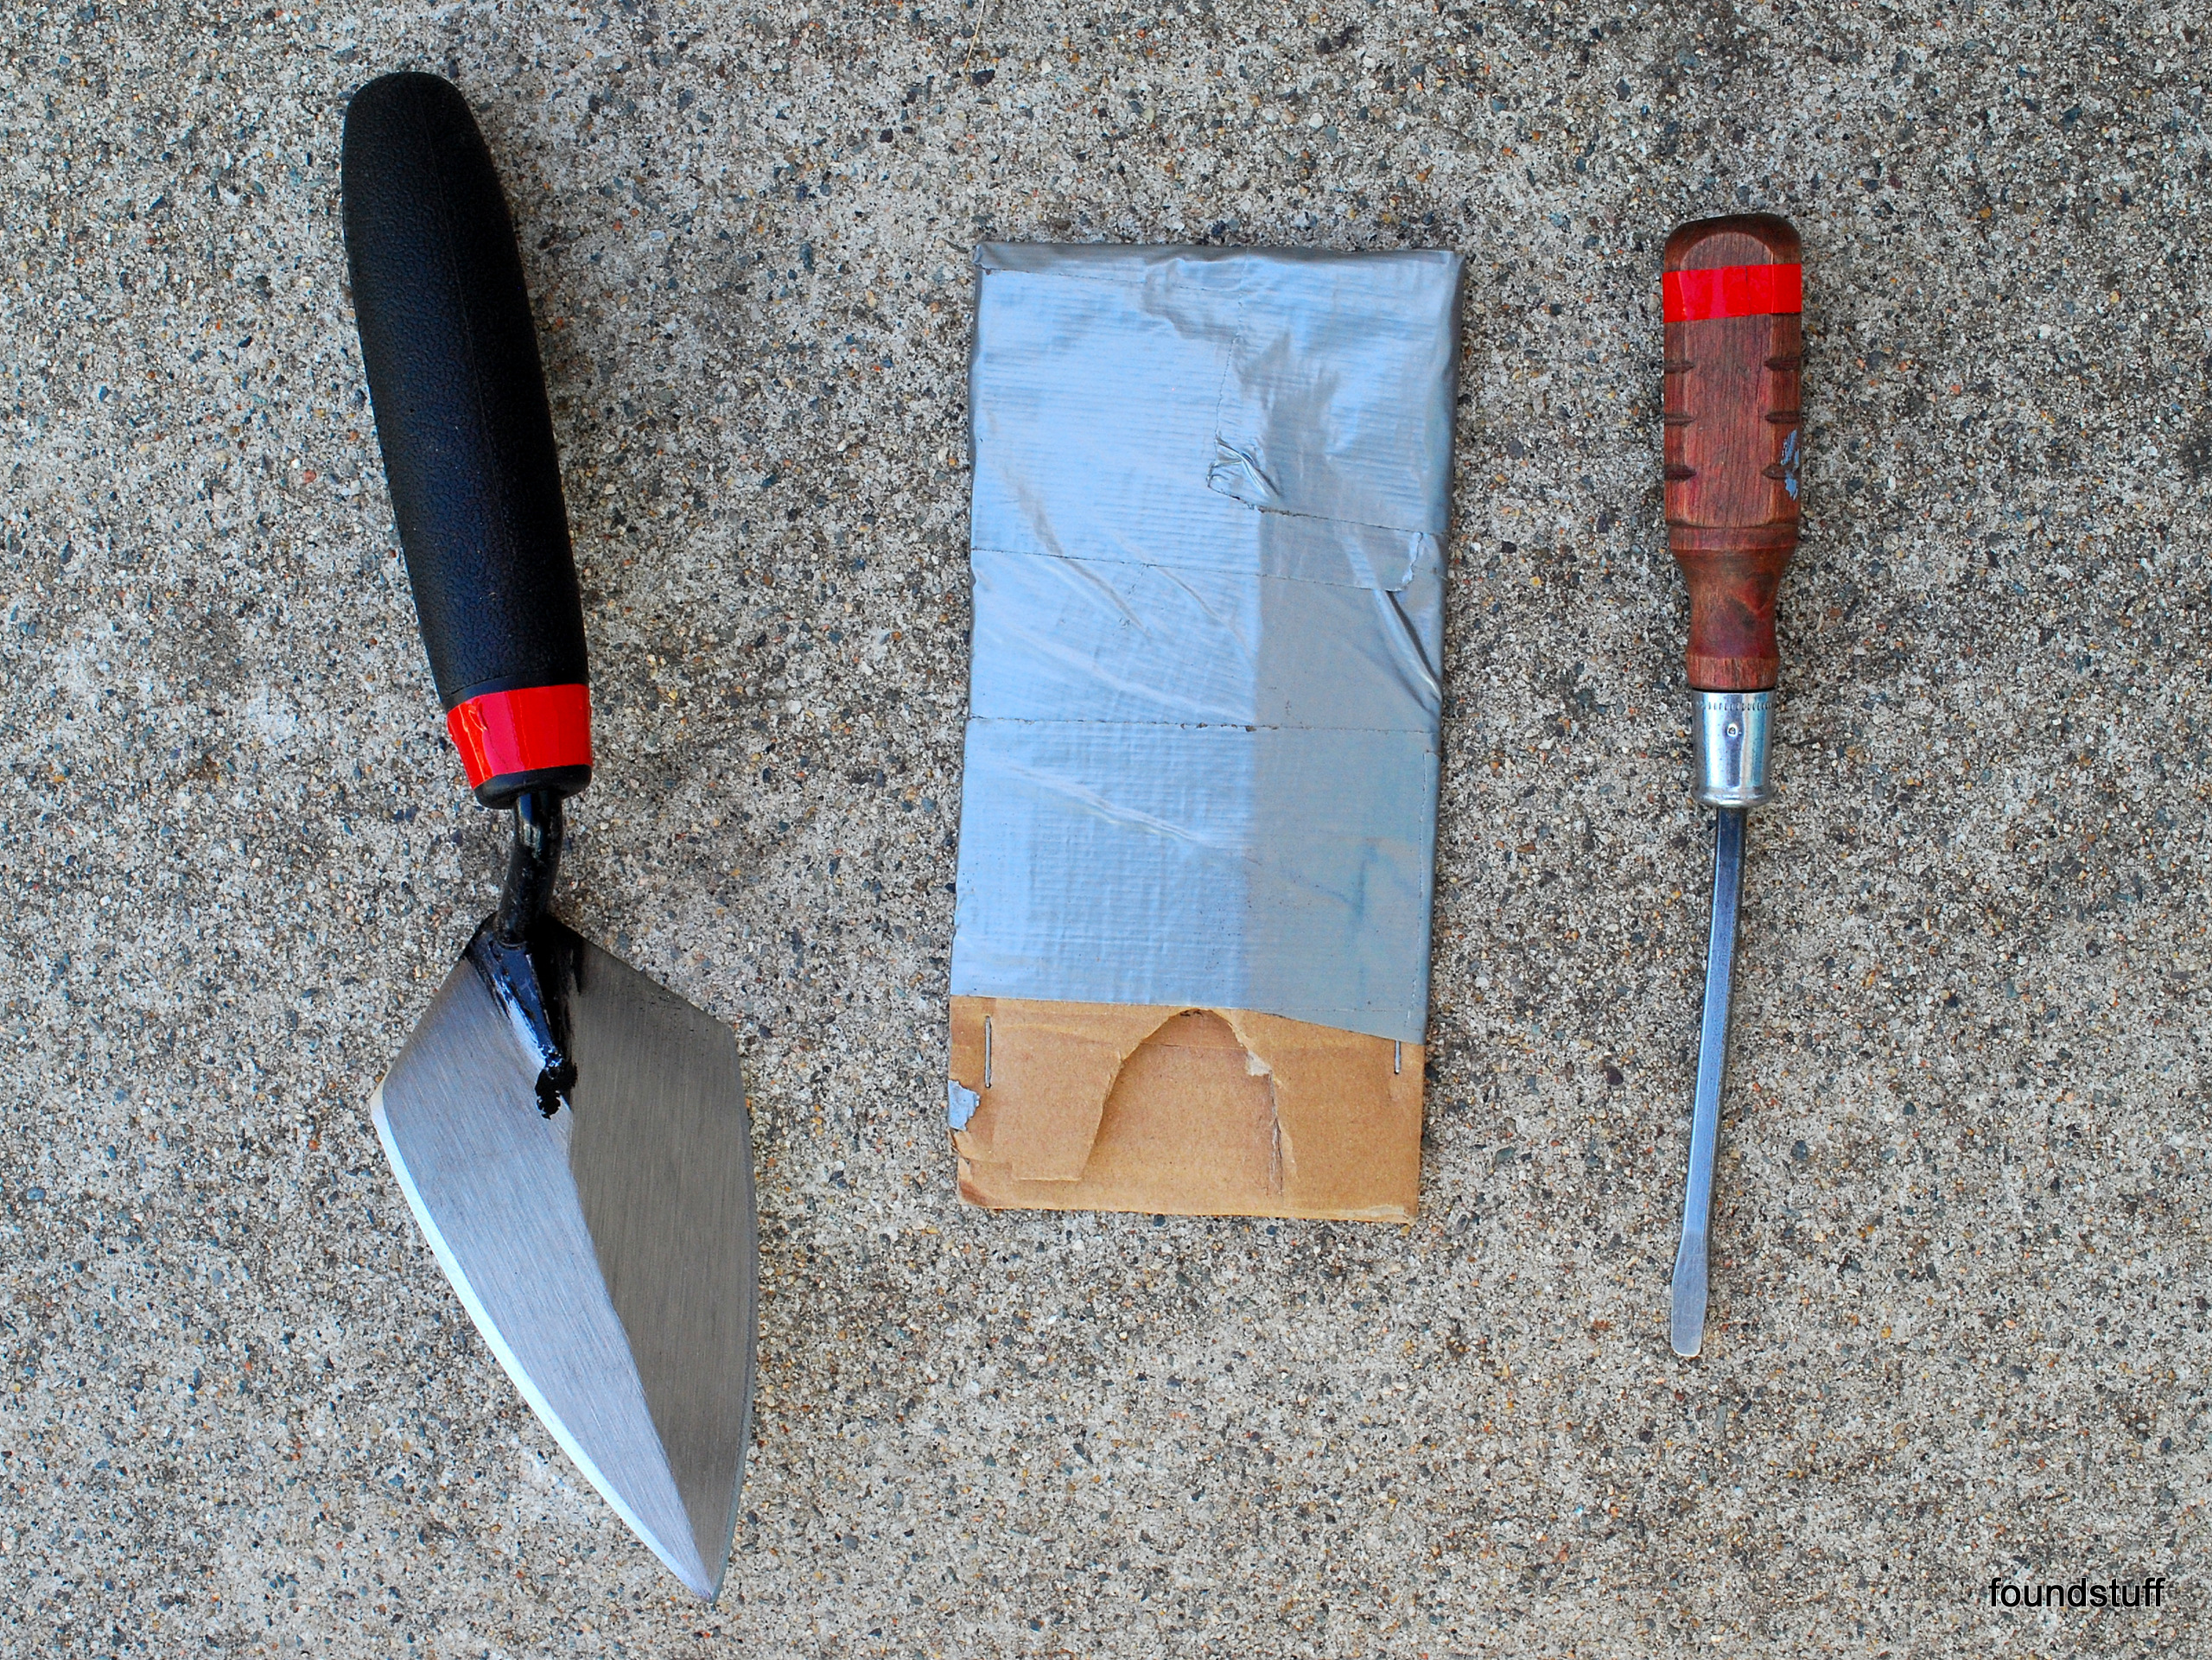
In fact, unless I'm specifically going somewhere I can dig, I don't even carry a shovel. Instead, I use a 4" screwdriver
to "pop" coins from just under the surface, leaving no hole, no mark, no sign anyone's been there. Here's how "coin-popping"
works: after pinpointing, I probe gently with the screwdriver until I hit the coin, work the screwdriver to the edge of the coin
by feel, and "pop" it to the surface. A quick thump and brush over the ground, and there's no sign I've been there. It's Leave No Trace
detecting! I filed the screwdriver tip so it's rounded, so as not to scratch finds. For clearing leaf litter, slicing the occasional
short slit, or sorting through a creek bank, I use an archaeologist's trowel, which is a short, sharpened bricklaying trowel. I found
this Marshalltown QLT 5" trowel in a clearance bin at Lowe's for less than $3. I sharpened it (file only the top side; keep the bottom
flat)and made a sheath out of folded cardboard, heavy-duty staples, and duct tape. The staples follow the shape of the trowel to keep
it from slicing through the cardboard. The duct tape keeps the cardboard from falling apart on wet grass. Note the cut out notch for the
ferrule. I applied strips of reflective tape to the handles of the trowel and screwdriver so I don't lose them.
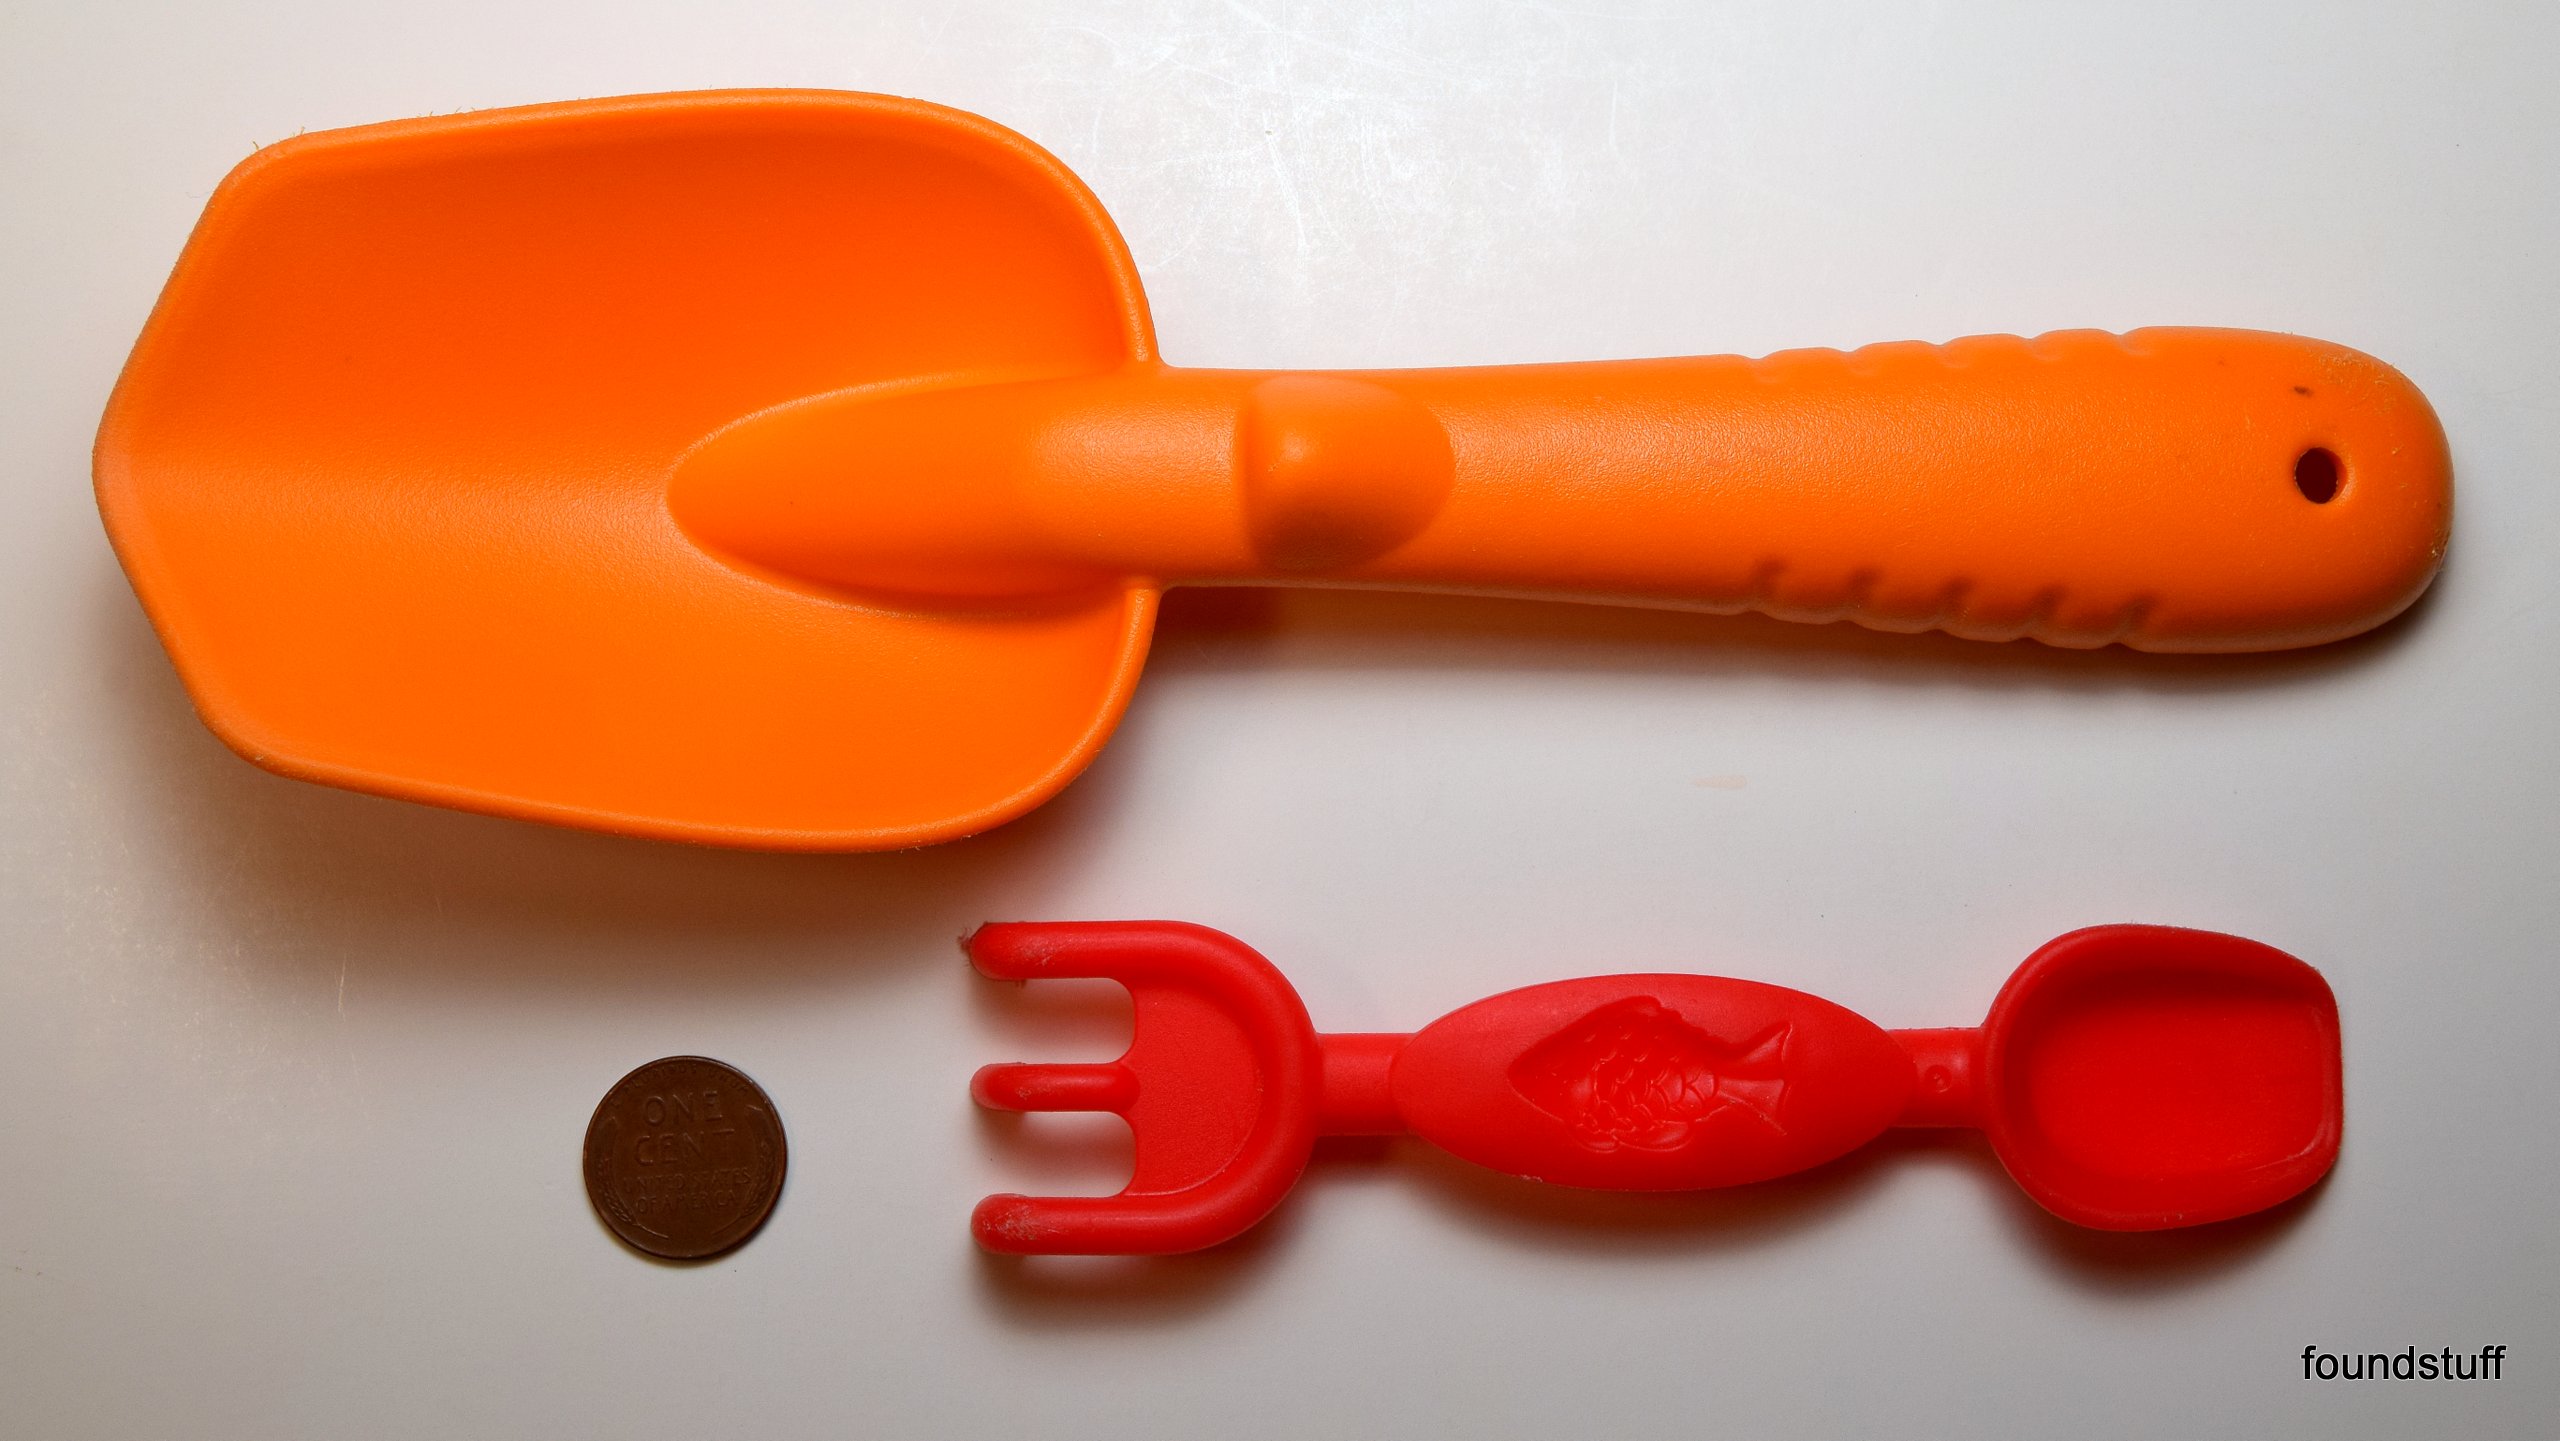
Tot lot tools.
I don't carry a shovel because I think it sends the wrong signal. I bought a plastic sand scoop/sifter, but it's a bulky, cumbersome
thing that doesn't work in damp, heavy sand and also doesn't work in wood chips. So I use these found tools, and they are perfect.
The little orange scoop is very sturdy, well up to digging through moist or wet sand. The tiny red spoon/rake is also very sturdy,
and is ideal for poking and sifting through sand and wood chips and even leaf litter. Both tools are toy-sized, as you can see by the
penny, so despite their bright colors they don't attract attention. And both are plastic, so I can use the pinpointer freely as I move
sand or wood chips around in search of the target.
Other things in my metal detecting bag. I always have two small microfiber cloths (I cut a dishcloth in half) to wipe down tools, my hands, or finds. I also have a small lock-back knife for slicing short slits in thick turf; I keep it on a tether so I don't lose it. I carry an Altoids tin as a finds box, and a couple plastic bags for the inevitable trash. In a zippered inner pouch, I carry three spare alkaline 9-volt batteries, two spare alkaline C-cell batteries, a couple zip-lock snack-sized bags for finds, a stick of sunscreen, a small assortment of adhesive bandages and a one-time use antibacterial ointment, and a spare headphone adapter. I keep a right-hand glove clipped to the strap so it's always ready to grab and use. The left hand glove is inside the bag, and rarely used because my left hand also has a wedding ring and quite often a watch so I try to wield tools left-handed and root around with my right. I have a water bottle clipped to the strap. The last super important thing I carry and use is a cap with a front brim and a neck guard - I wear my headphones over it.
Back to My Metal Detecting Journal
Back to the Kuraoka Family main page